Rheonics sensors are compatible with Modicon M262 PLC, for the correct integration of our sensor follow these steps:
1. Install the EDS file1.1. Go to the support portal and download the eds file that corresponds to your sensor.
EthernetIP EDS file for Rheonics inline viscometer and density meter
1.2. Open Machine Expert Logic builder
1.3. Go to the "tools" tab and select Device Repository

Figure 1. Selection of Device Repository option on Tools tab
1.4. Click the Install button and select the eds file that is downloaded from the Rheonics Support Portal, once the file is installed it will appear under the option of "Ethernet/Ip targets/Other"
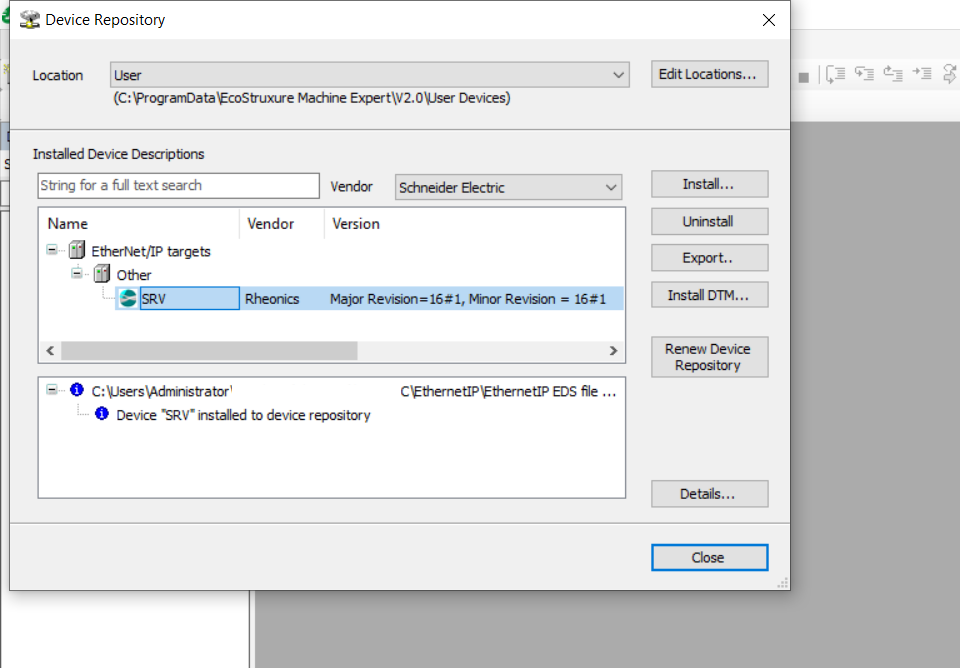
Figure 2. Installing eds file for SRV sensor.
2. Adding Rheonics Sensor to Project2.1. To add the Rheonics Sensor to your project, add the controller that matches your requirement (Modicon M262) and select Ethernet port "Ethernet_2(ETH2). Click the green plus symbol.

Figure 3. Selecting the Ethernet port to establish the Ethernet/IP Scanner
2.2. Add Ethernet/IP Scanner under Protocol Managers folder.

Figure 4. Adding Ethernet/IP scanner to the project.
2.3. Right-click into the Ethernet/IP scanner to insert a new device, and write “SRV” on the search bar and the sensor to your project.

Figure 5. Adding Rheonics Sensor to Device Tree
2.4. When opening the newly created SRV device, we can assign the IP address and verify additional information from the device.

Figure 6. IP Address settings screen.
2.5. Go to the Connection Tab and set the maximum RPI(Requested Packet Interval) to 3200ms

Figure 7. RPI modification
2.6. Go to the "Ethernet I/O Mapping" Tab and Right-click on the SRV sensor Symbol and select "Import mappings from CSV. Select SRV Mappings file that is available on this page for download.

2.7. It is recommended to set the parameter Always update variables on the value “always in bus cycles task”
