
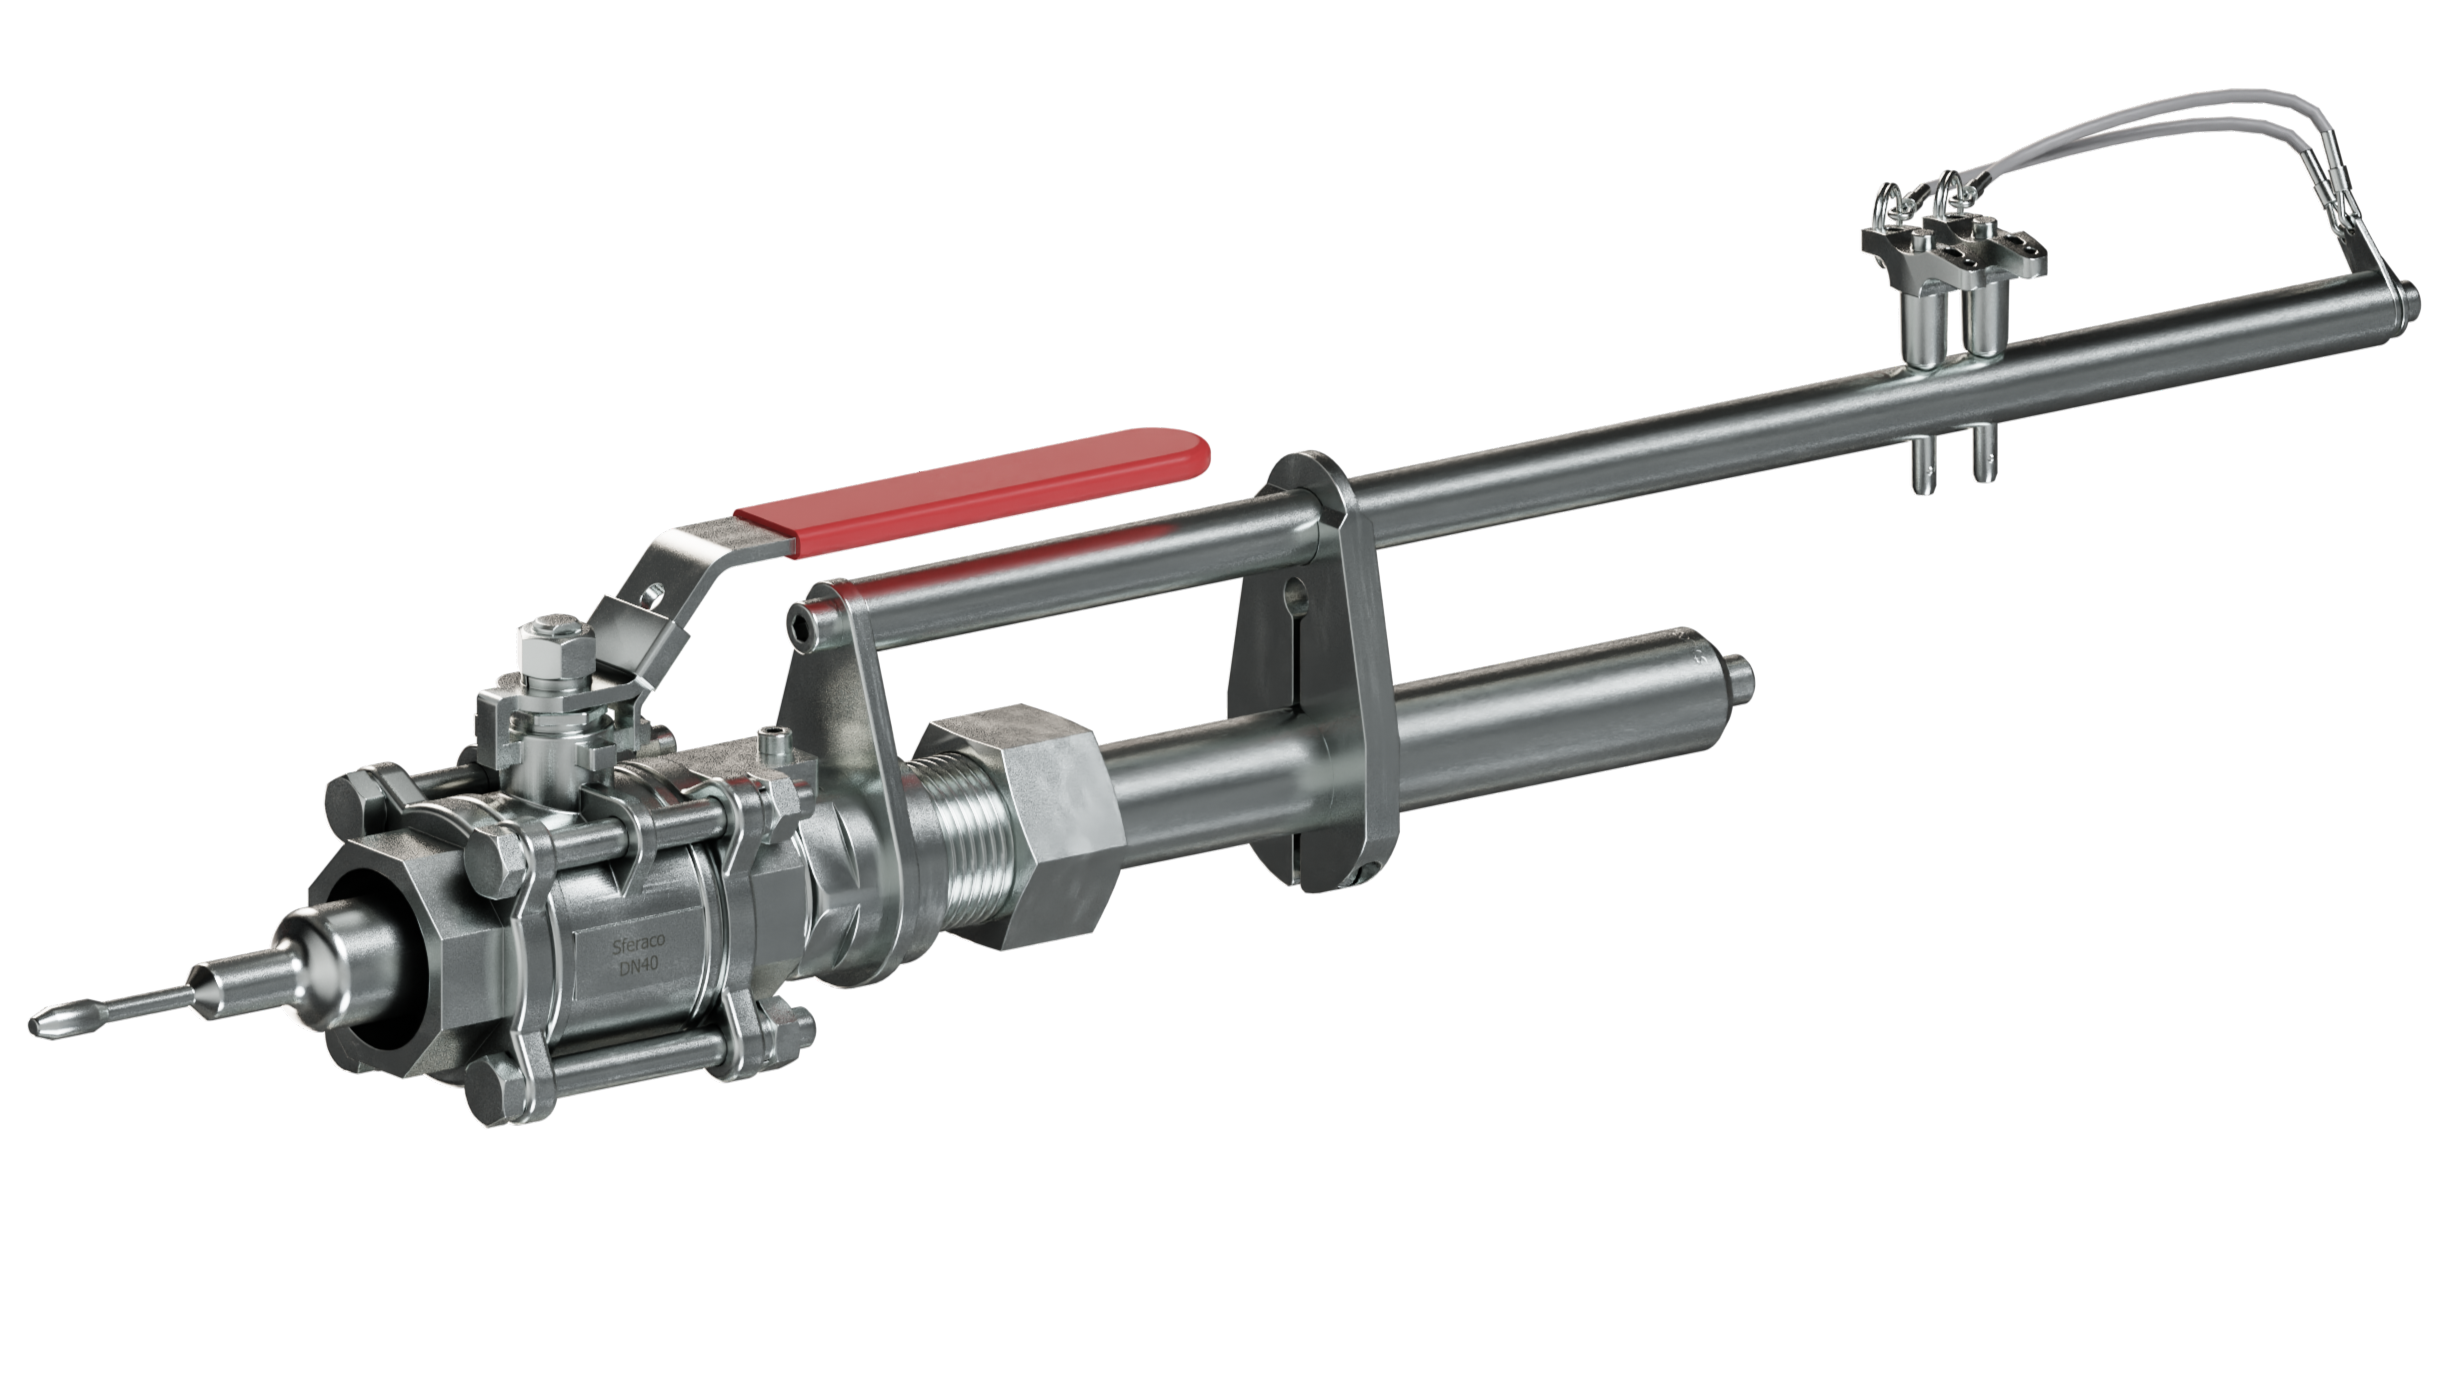
What products are involved?
Rheonics RPA System to use with inline process viscometer and density meter in variants Type-SR X8: Teletube Ultra-Long Insertion Probe, SRV-X5, and SRD-X5.
What is the purpose of this article?
To give an overview of the Rheonics Retractable Probe Assembly, Rheonics-RPA, description, and where to use it.
1. Overview
In industrial applications often there is often a need to remove instrumentation from pipes or tanks, without emptying the equipment or stopping the production. In these cases, Rheonics inline process viscometer SRV and density meter, and viscometer SRD sensors can be installed with the Rheonics Retractable Probe Assembly - RPA.
The Rheonics RPA allows the retraction and insertion of Type-SR Sensor probes from the line without disrupting the process. This minimizes downtime for probe inspection or line cleaning since the user doesn’t need to stop the process, drain the lines, or create work stoppage orders to remove instrumentation during pigging operations.
The Rheonics Retractable Probe Assembly can use the long insertion probe (X5 option) or the teletube (X8) variant (explained in detail in the ordering section below). The RPA uses a ball valve to isolate process fluid from the outside environment. The probe is inserted or retracted through the open ball valve. After the probe is retracted, the ball valve is closed to isolate the probe from the fluid inside the line. For sealing purposes, the Rheonics RPA uses a compression fitting nut to fix or allow the movement of the probe. A vertical guide rod allows the linear motion of the probe without undesired movements during insertion or retraction.
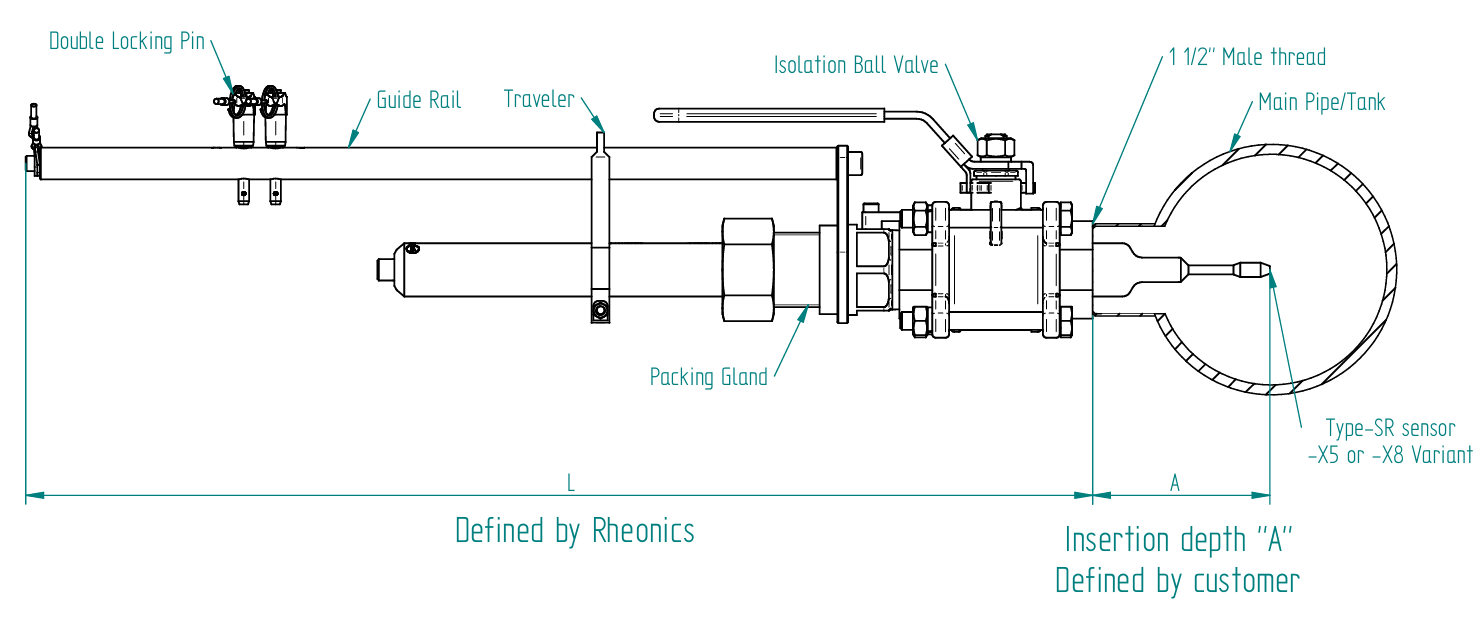
Figure 1. Retractable Probe Overview
Specifications | |
| Sensor compatibility | |
| Order code | RPA (Retractable Probe Assembly) |
| Probe material | Stainless Steel 316L |
| Probe Length | Customizable |
| Process Connection | 1 1/2” NPT Thread |
Pressure Range | Up to 580 psi (40 bar) |
| Installation Place | In pipes and Tanks |
| Drawings | RPA Drawing |
2. Where to use the Rheonics Retractable Probe Assembly?
In certain industrial applications, removing sensors without draining the line might be necessary for maintenance, cleaning, or replacement without interrupting the production processes.
In addition, when a line should be piggable, it is required for the probe to be removed from the line when the pigging operation is ongoing. Instead of removing the complete probe, a more time-efficient mechanism is to use retraction to remove the probe from inside the line thus removing any obstruction from the path of the pigging device. Once the pigging operation is finished, the probe can be reinserted.
Another use case is when the probe needs to be checked or cleaned during operation, the retractable assembly is able to remove it from the process line for in-situ or external verification and cleaning.
This ability allows for minimizing downtime, reducing product loss, and maintaining operational efficiency. Some of these industries are:
- Crude oil transfer pipelines
- Chemical Processing.
- Oil and Gas Industry.
- Water Treatment Plants.
- Food and Beverage Production.
- Pharmaceutical Manufacturing.
- Industries using Pigging system.
Advantages of retractable density meter and viscometer:
- Removal of the sensor without affecting the ongoing process
- Ensuring the process line is piggable.
- In-situ cleaning of the probe without contaminating the process fluid (option through upgrades).
- In-situ calibration verification using known fluid check in the RPQ assembly (option through upgrades).
3. Parts Index
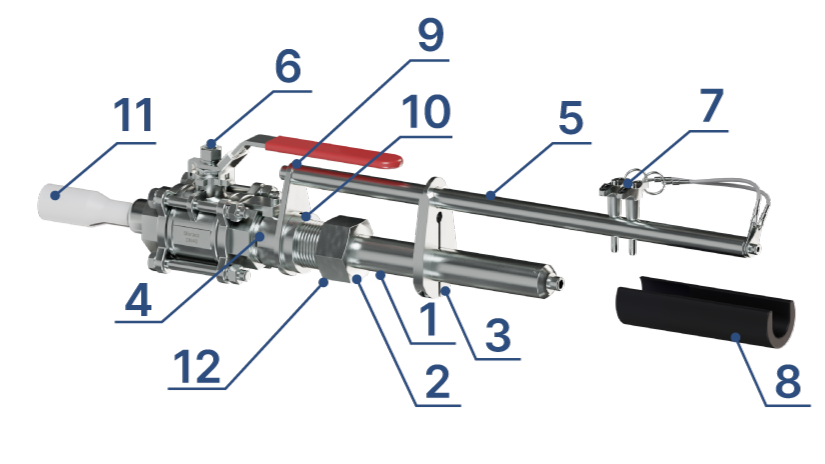 Figure 2. Retractable Probe Parts
| N° | Pro. Key | Name |
| 1 | SRV/SRD-X5/X8 | Sensor Probe |
| 2 | CN-RPA | Compression Nut |
| 3 | TS-RPA | Traveler sheet |
| 4 | 1N50-RPA | 1 1/2'' NPT adapter |
| 5 | RD-RPA | Guiding Rail |
| 6 | BV1N50-RPA | 1 1/2'' NPT thread Ball valve |
| 7 | LP-RPA | Locking pins |
| 8 | SS-RPA | Support Sleeve |
| 9 | ST-RPA | Static guide slab |
| 10 | AN-RPA | M42 adapter nut |
| 11 | SR-HD-PS | Protective sleeve |
| 12 | OR-RPA | 30x3mm O-ring (hidden on the image) |
4. What is included in a standard delivery?
Item | Name | Quantity | Reference Image |
1 | 1 ½” NPT Ball Valve + 1 1/2” NPT Retract Adapter | 1 | 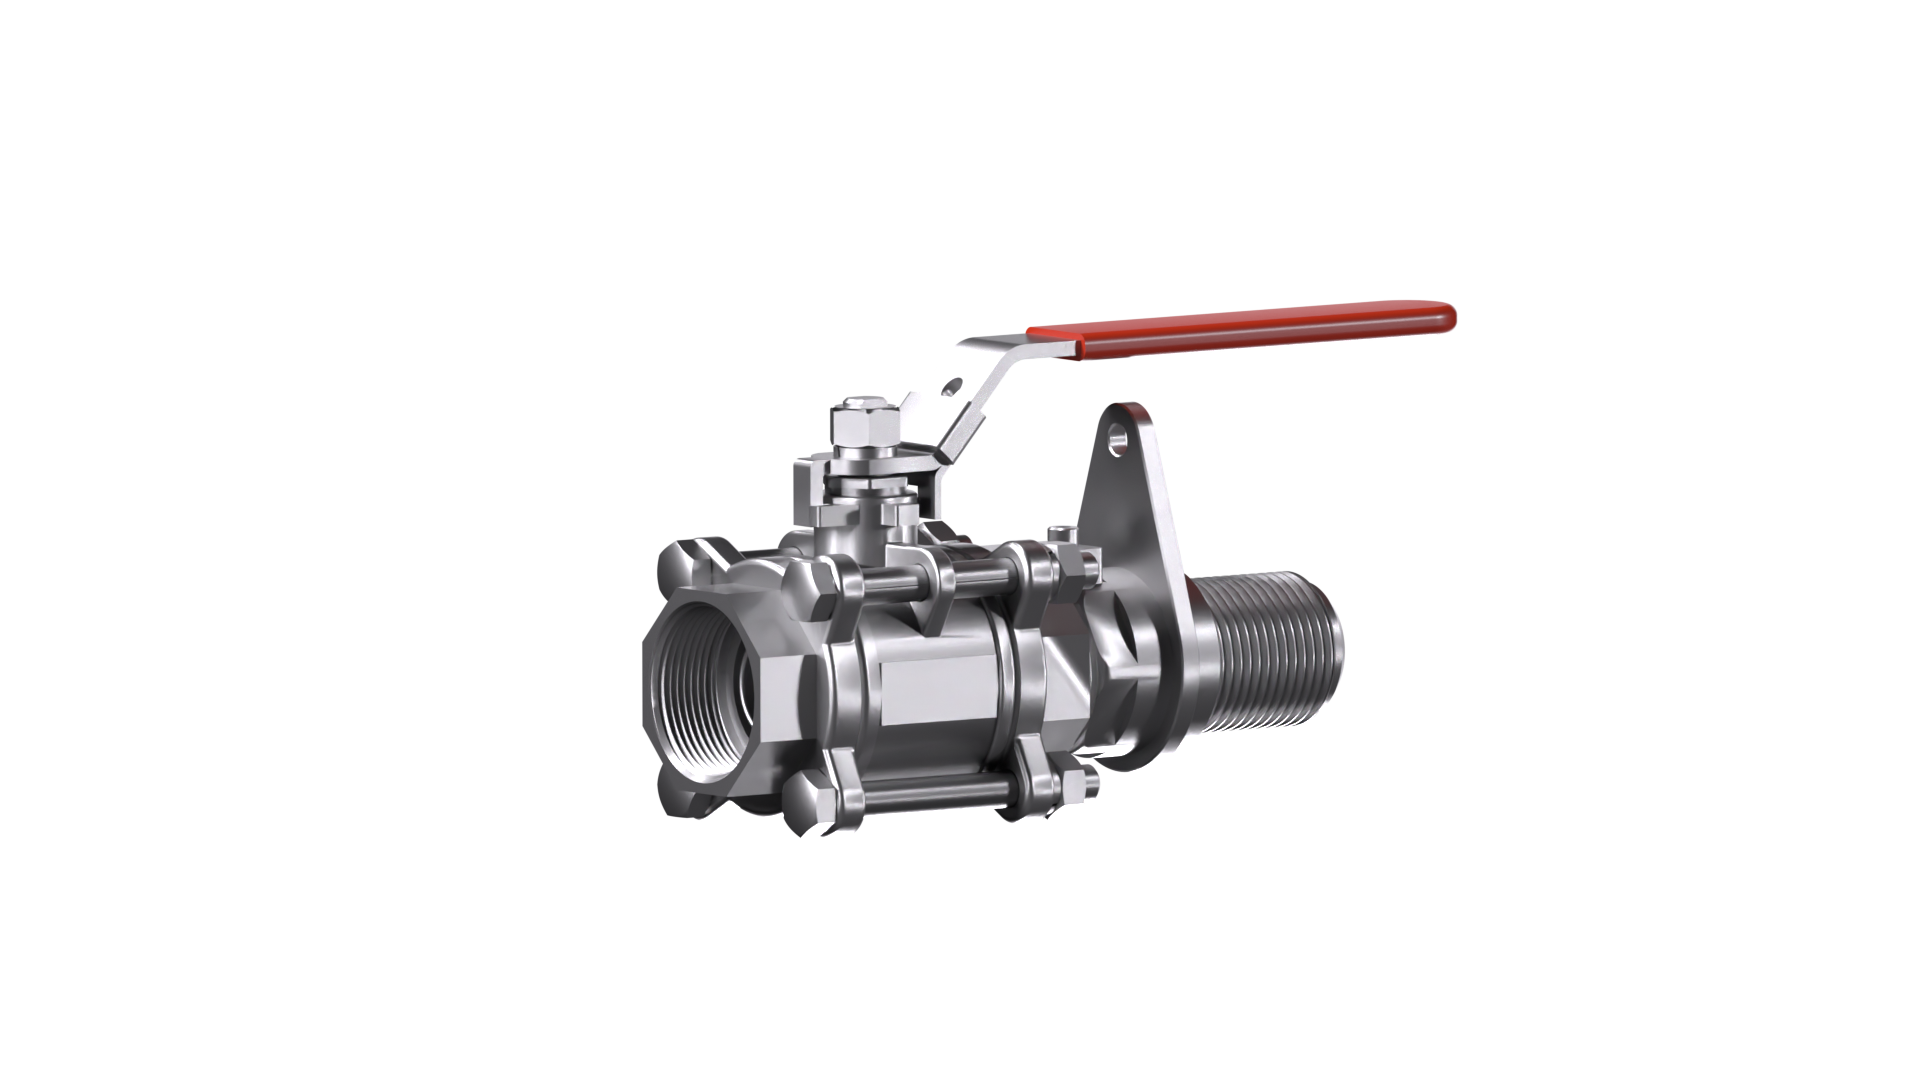 |
2 | Retract Guiding Rod | 1 | 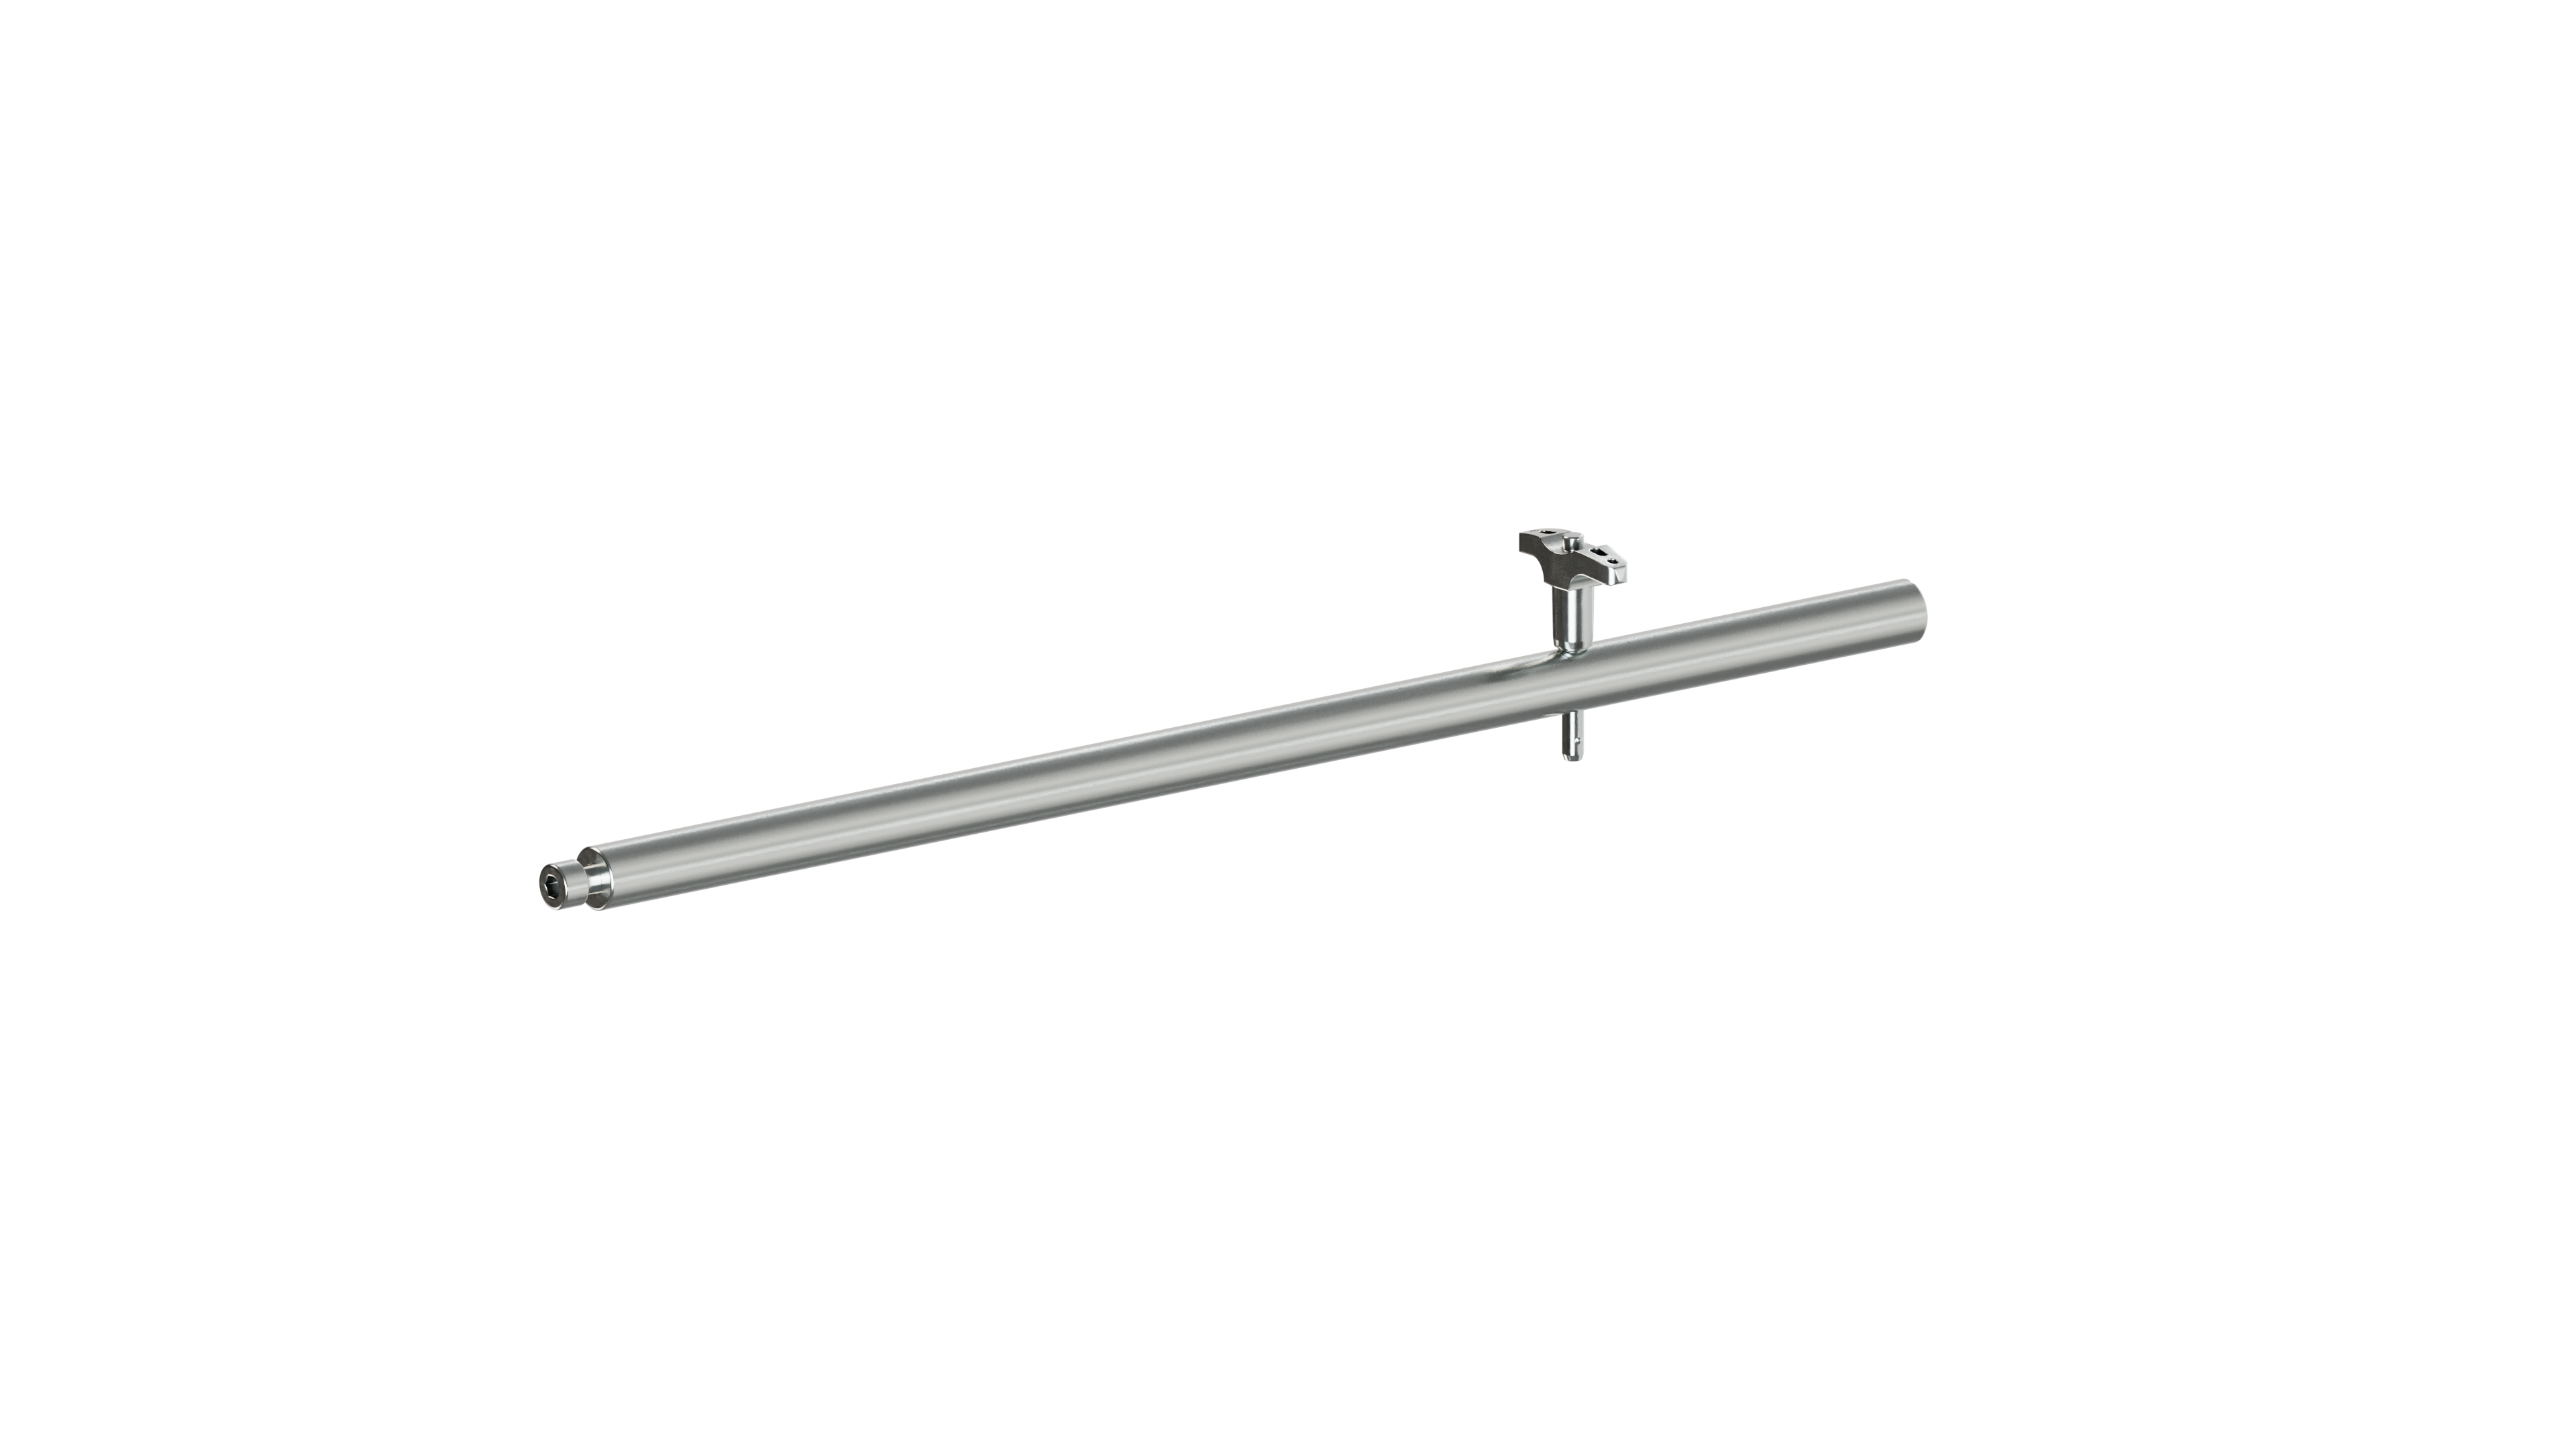 |
3 | Retract Probe Assembly | 1 | 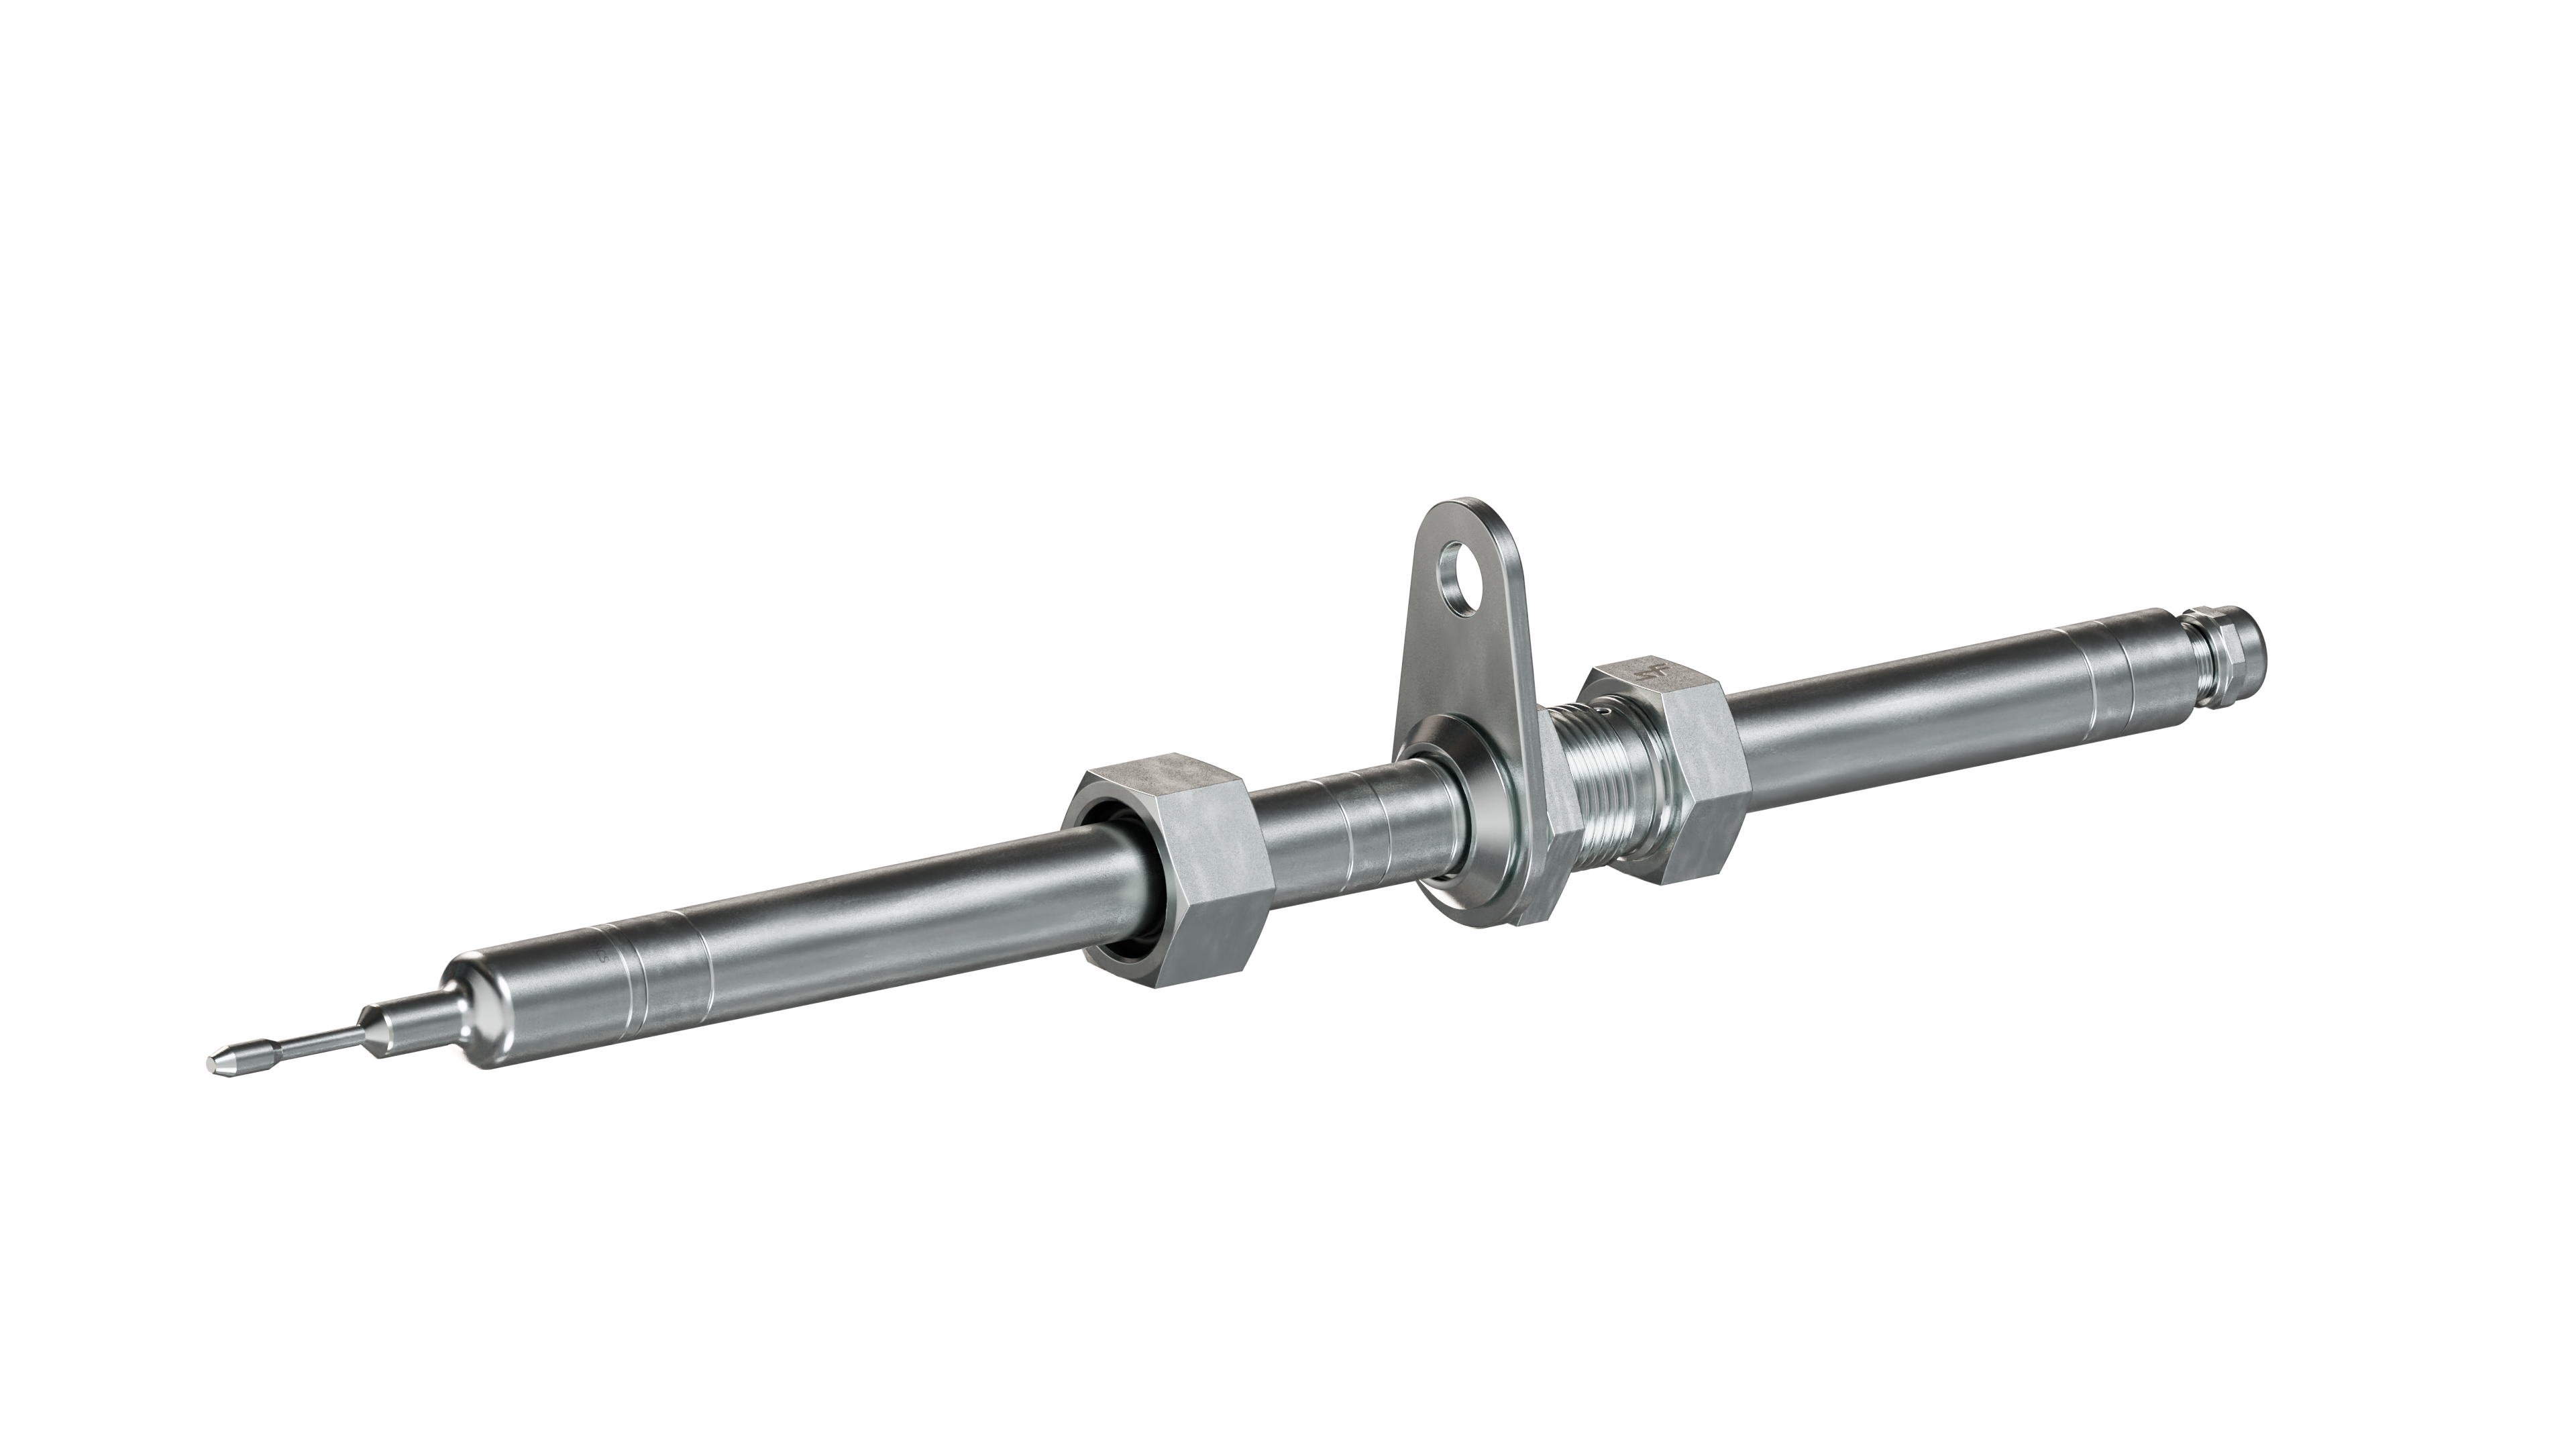 |
4 | Retract Support Sleeve | 1 | 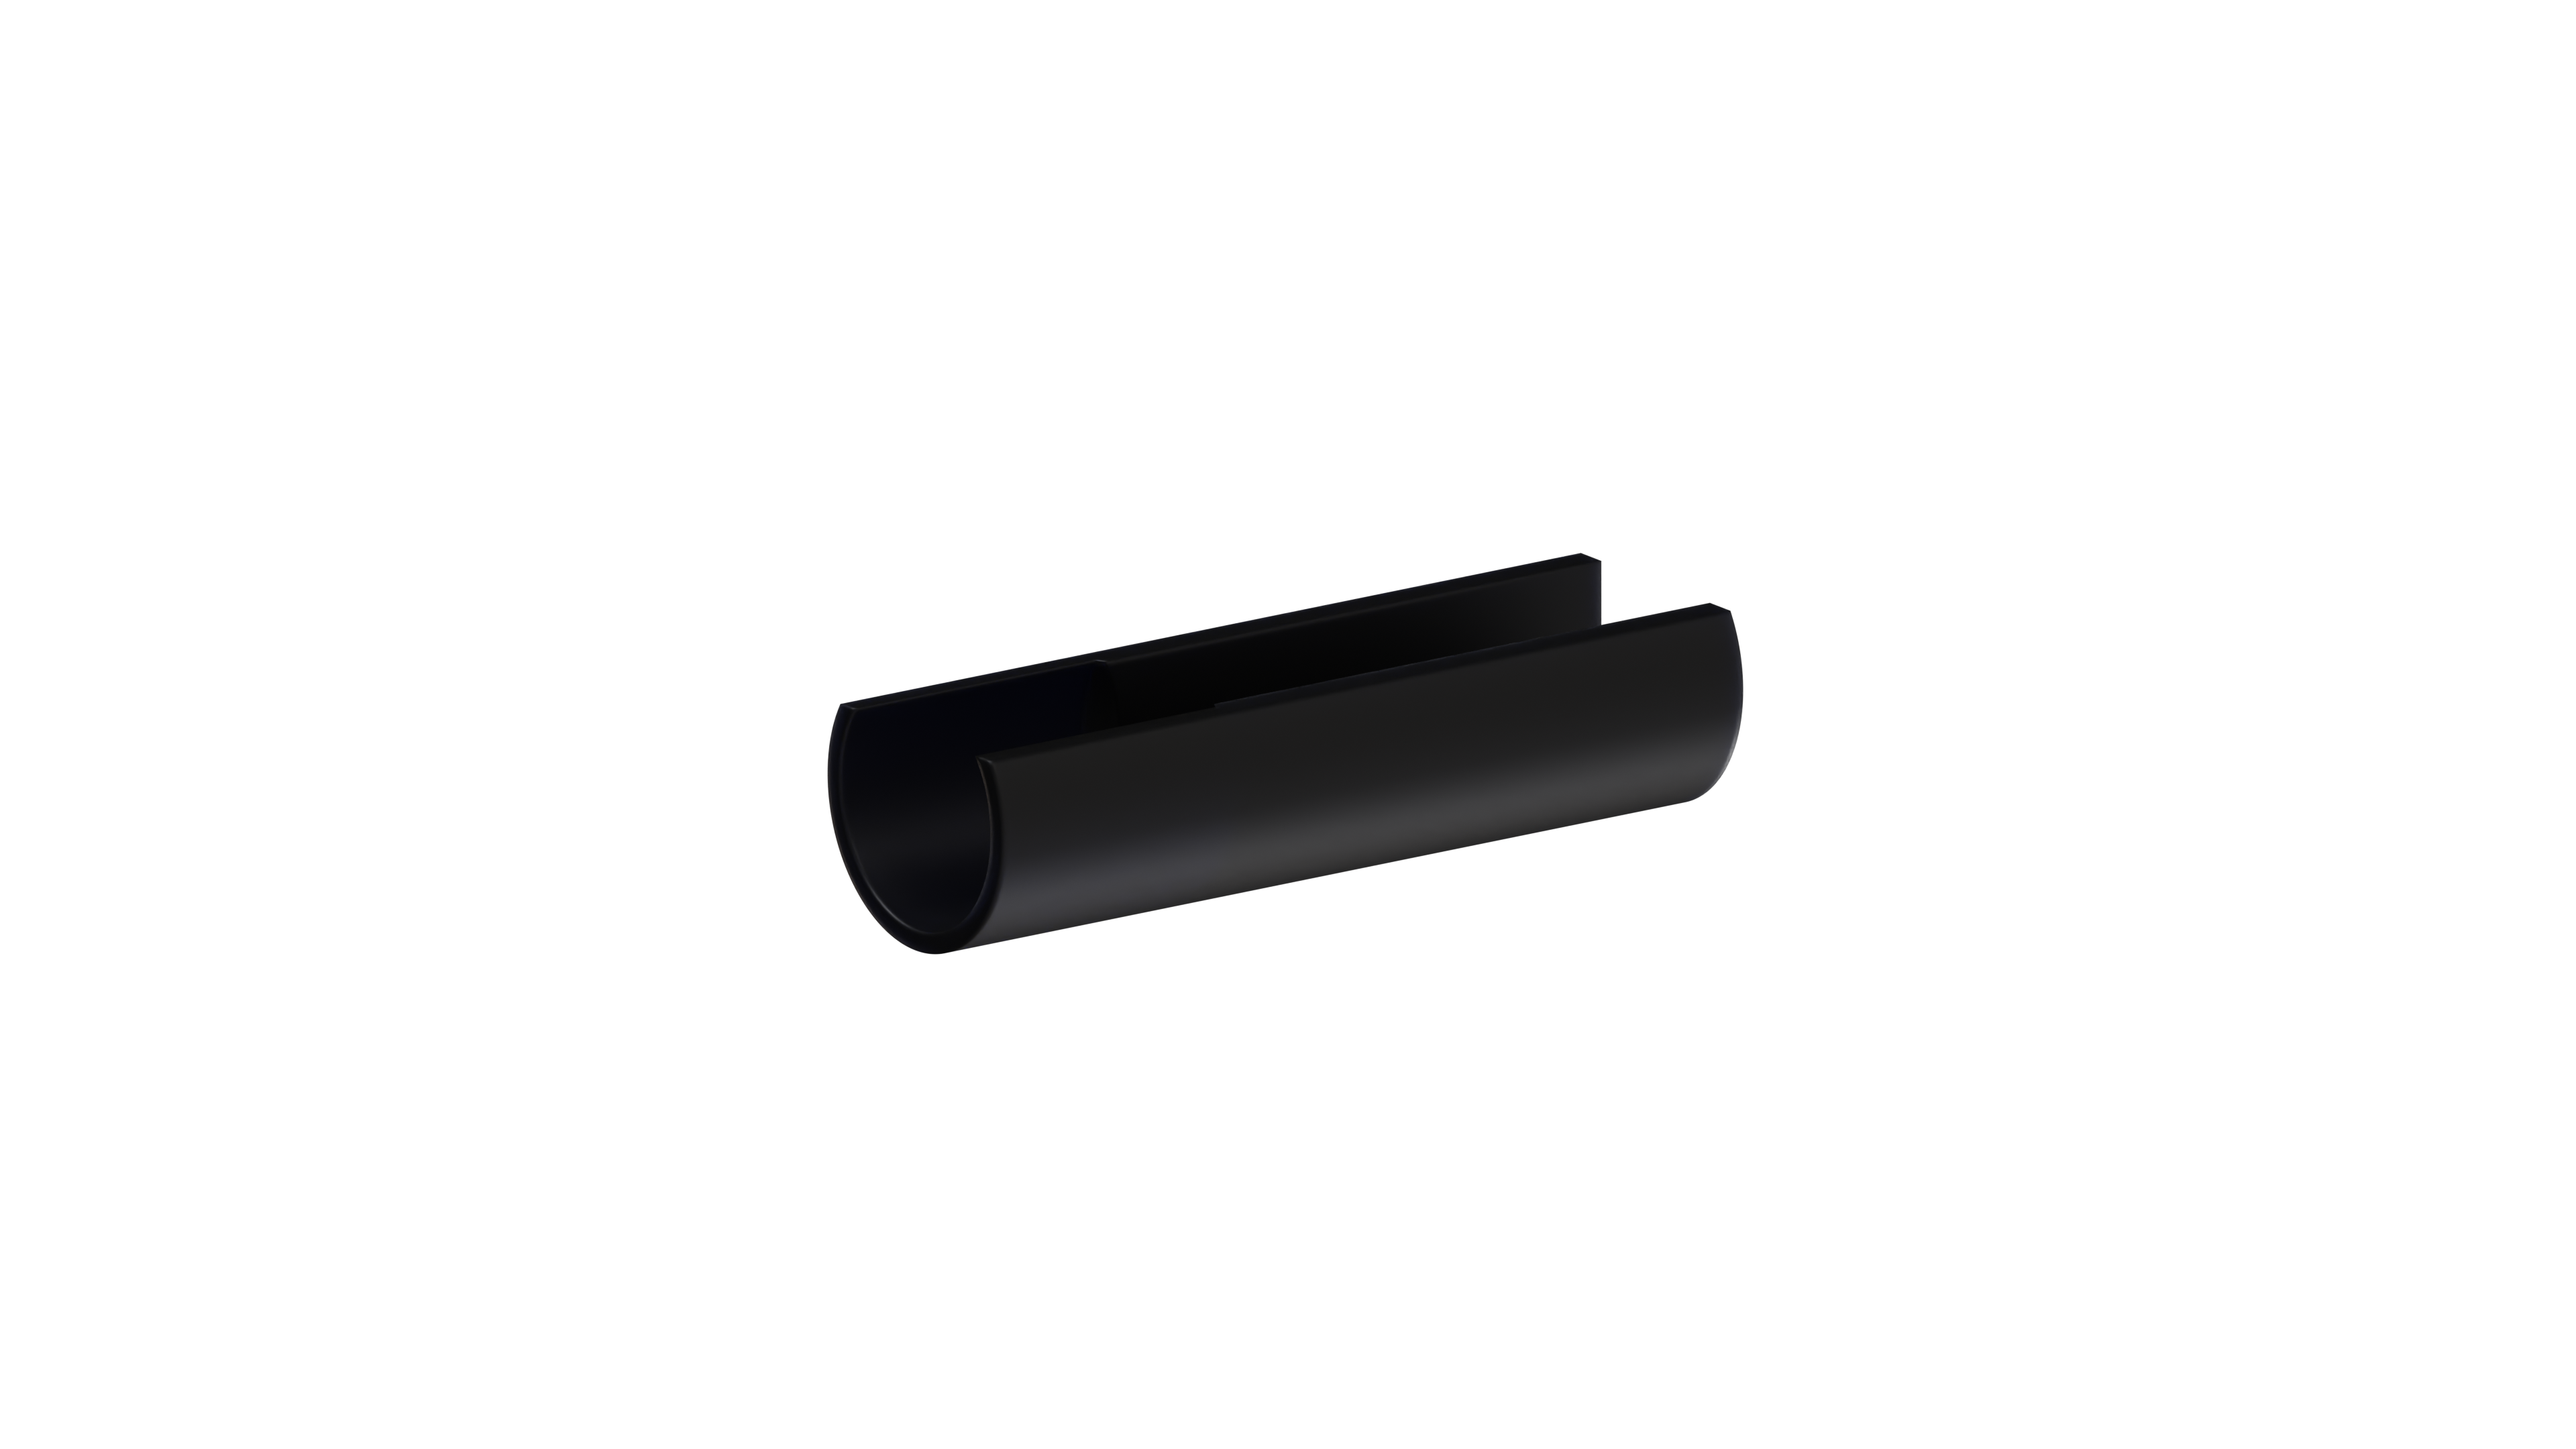 |
5 | 50 mm Wrench | 1 | 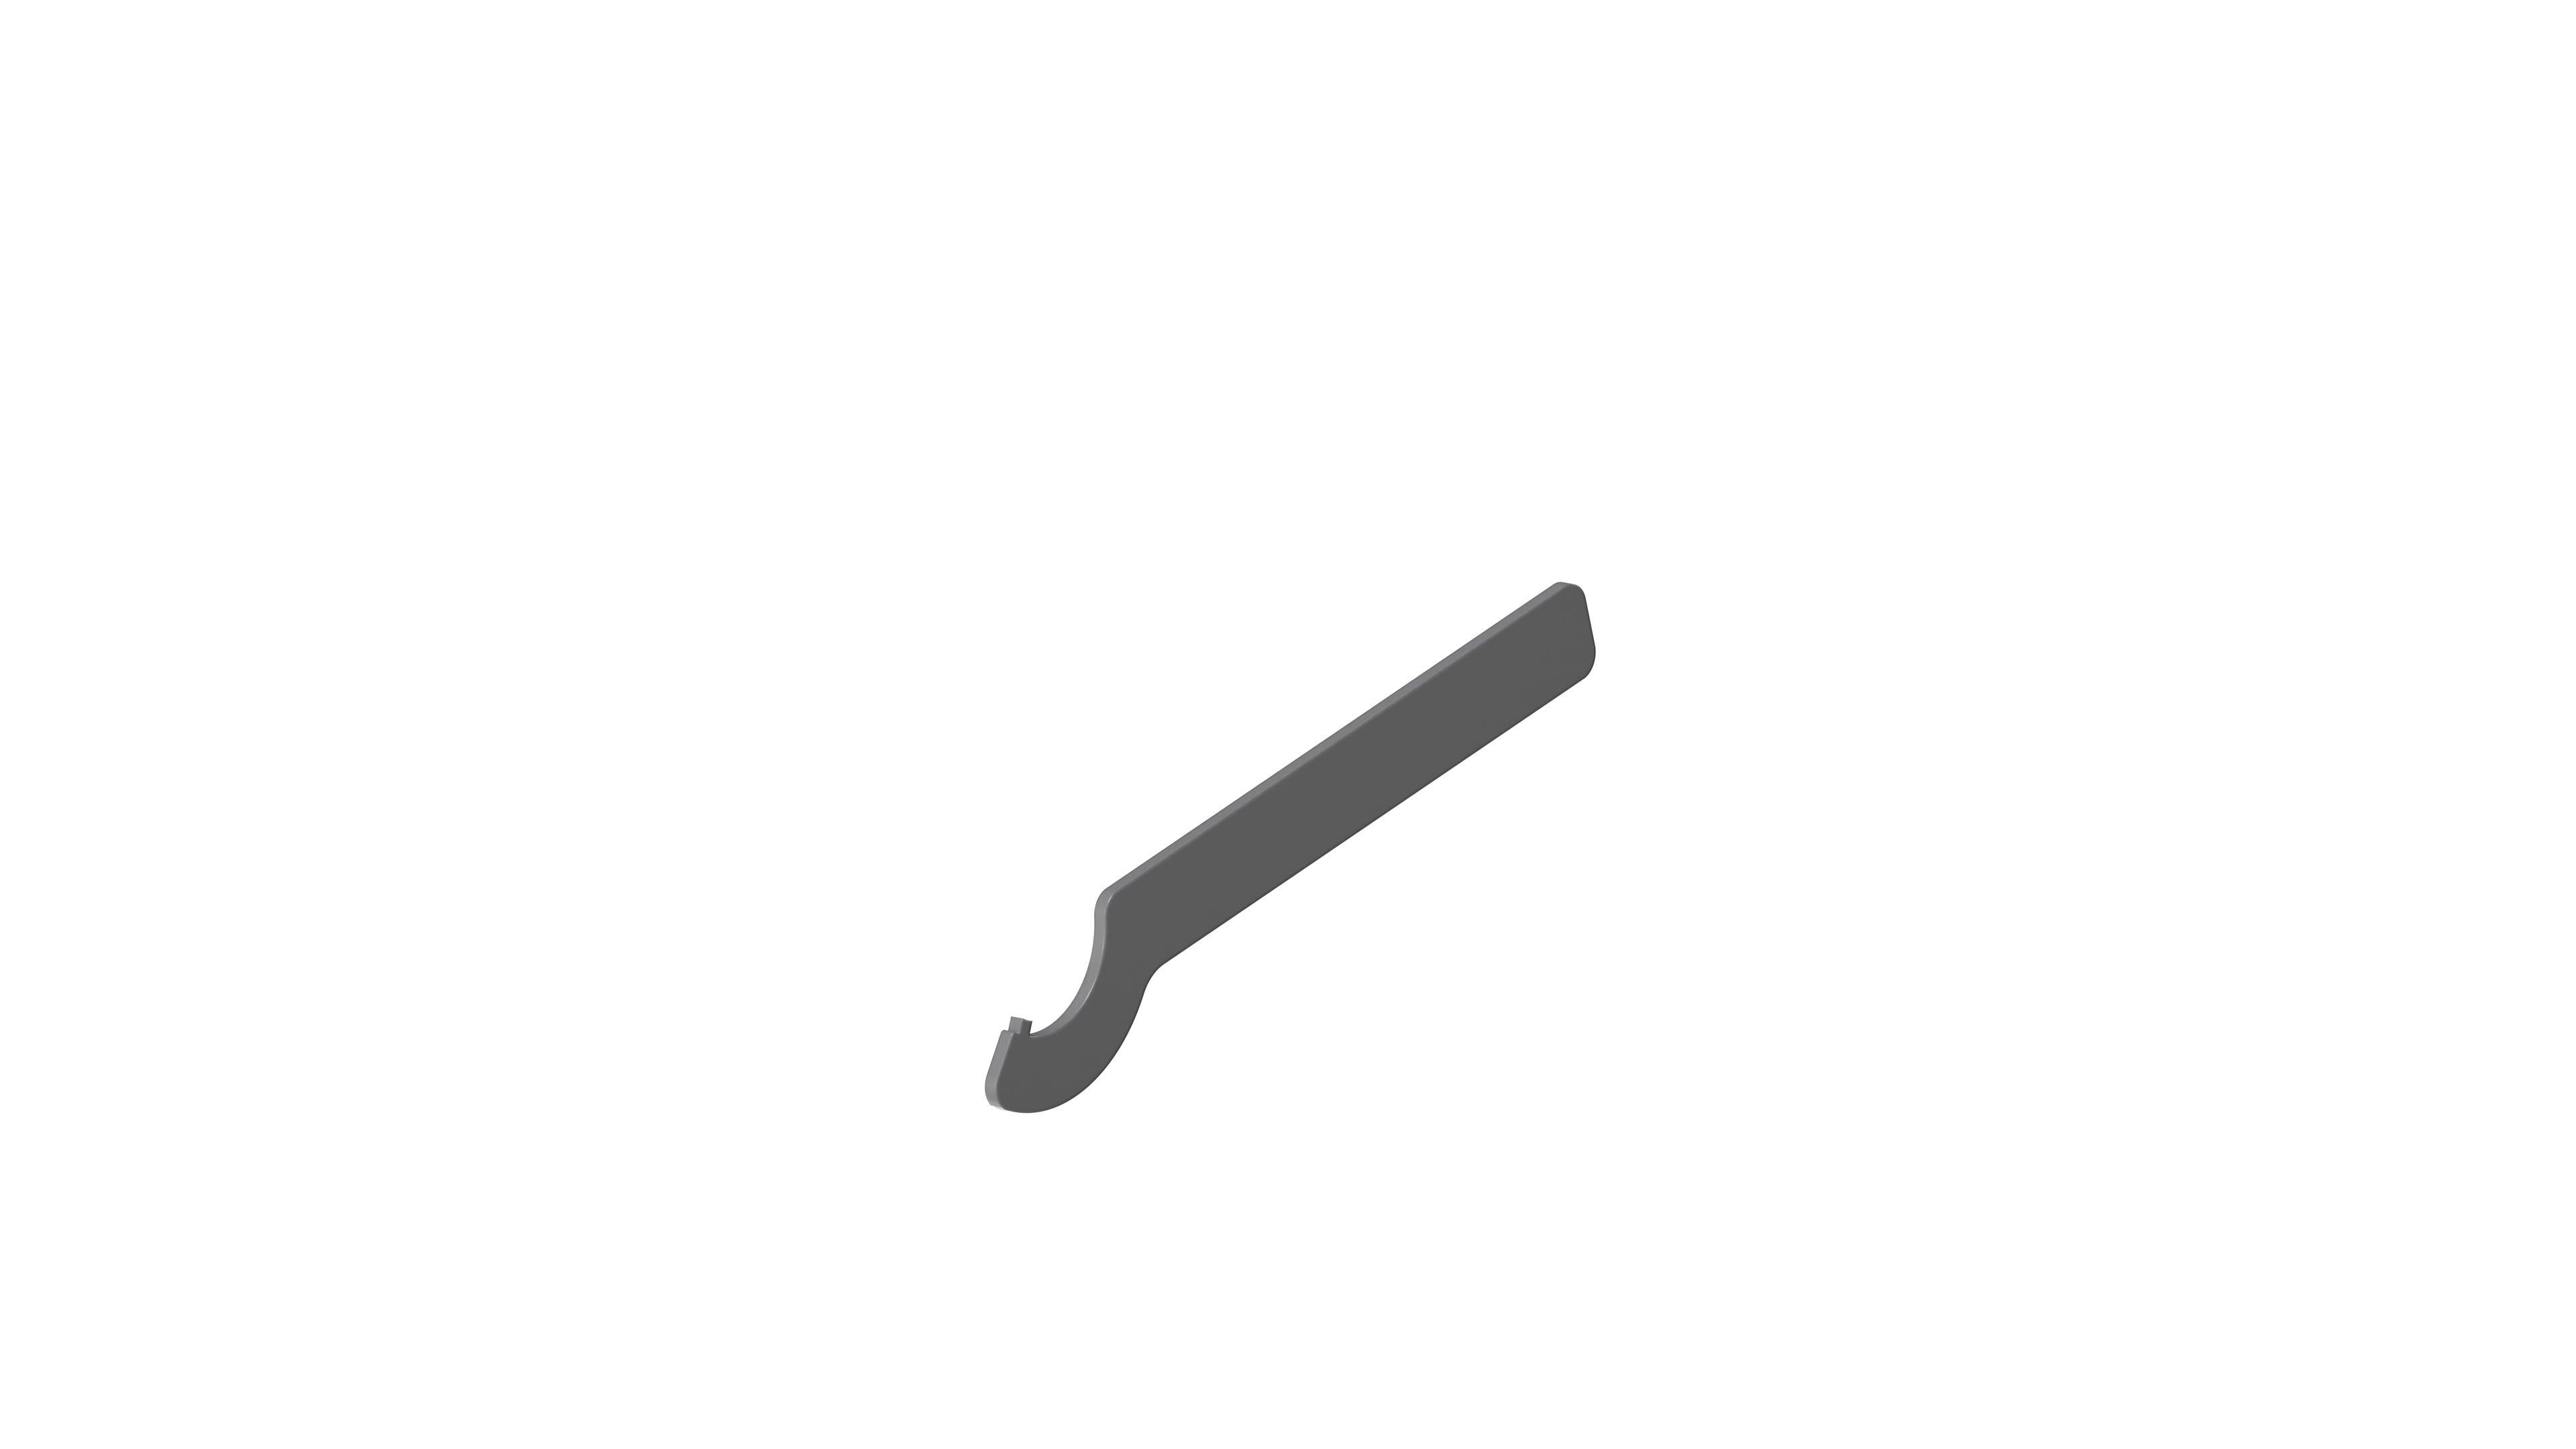 |
5. How to prepare a pipe or tank for the RPA installation?
The Rheonics Retractable Probe (RPA) can be seamlessly integrated into the process by using a male 1 1/2” NPT thread, allowing for the valve to be securely threaded. This could be, for example, using a standpipe or an existing port with an adapter to transition to the required thread.
The installation must have a minimum inner diameter of ⌀35 mm to ensure proper immersion and retraction of the sensor probe.
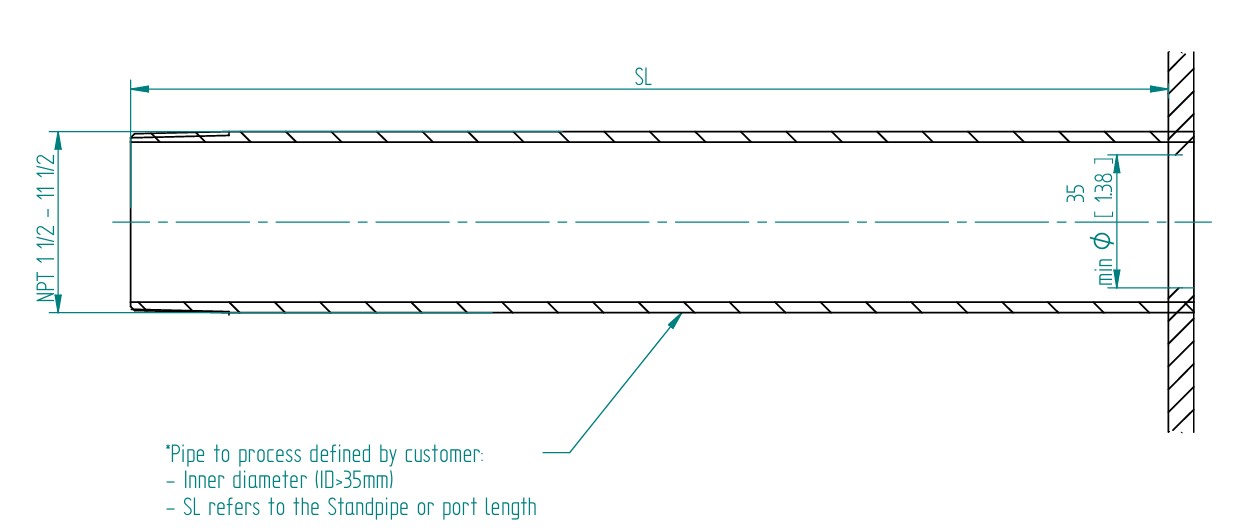 Figure 3. Retractable Probe Installation Interface
To prepare the pipe or tank for the RPA installation, follow these instructions:
- Identify and define the installation point; only a male 1 1/2” NPT Thread is required. This could be using a standpipe or using an existing port with an adapter to transition to the required thread.
- Now, follow the detailed assembly instructions below to install the RPA.
6. Assembly and Installation Instructions
The assembly of this product is simple because most of the parts are delivered assembled. Follow the next steps to start using the retractable probe.
1. RPA Disassembly
| Step | Instruction | Image |
| 1 | Remove the protective sleeve SR-HD-PS from the probe tip. Rheonics recommends storing the protective sleeve to protect the sensing element whenever the probe is outside of the RPA assembly. | 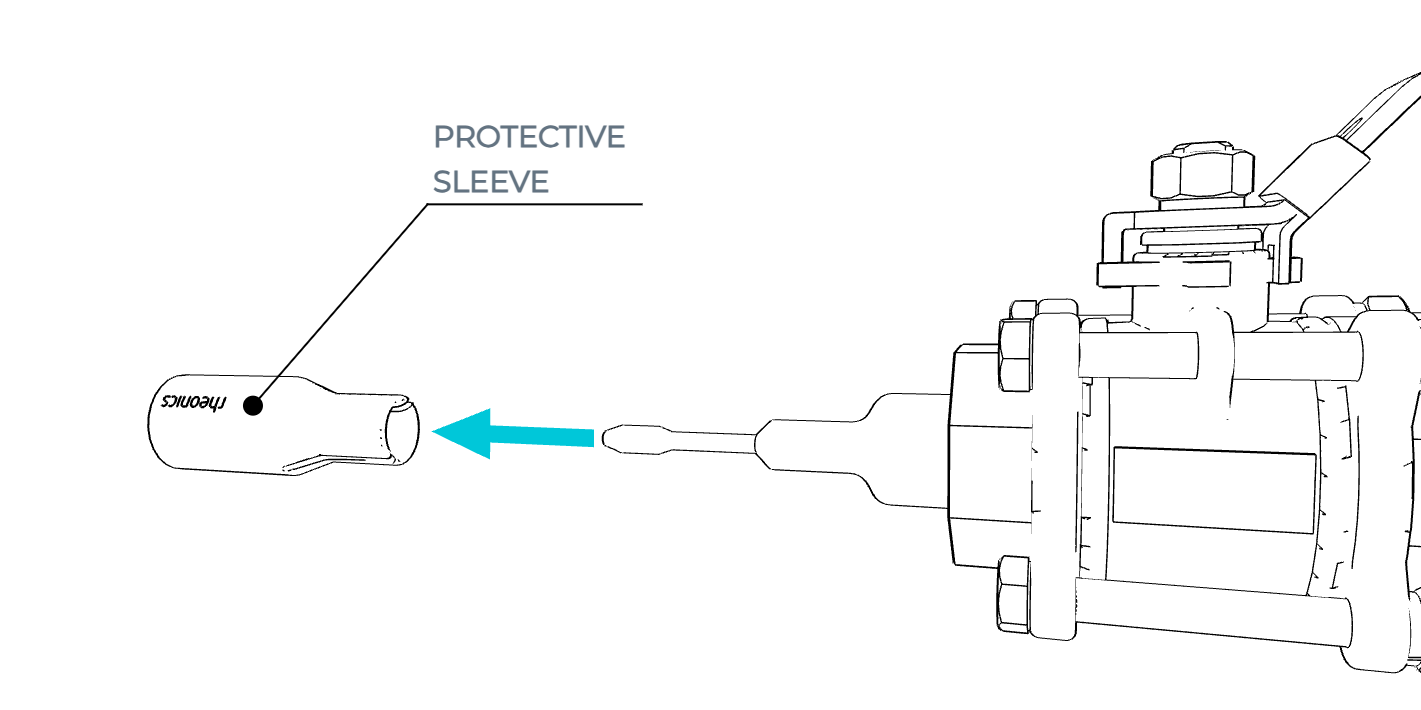 |
2 | Remove the M5 screw at the back of the guiding rail RD-RPA to free the tabs of the retaining cables holding the locking pins LP-RPA. Store the screw in a safe place. | 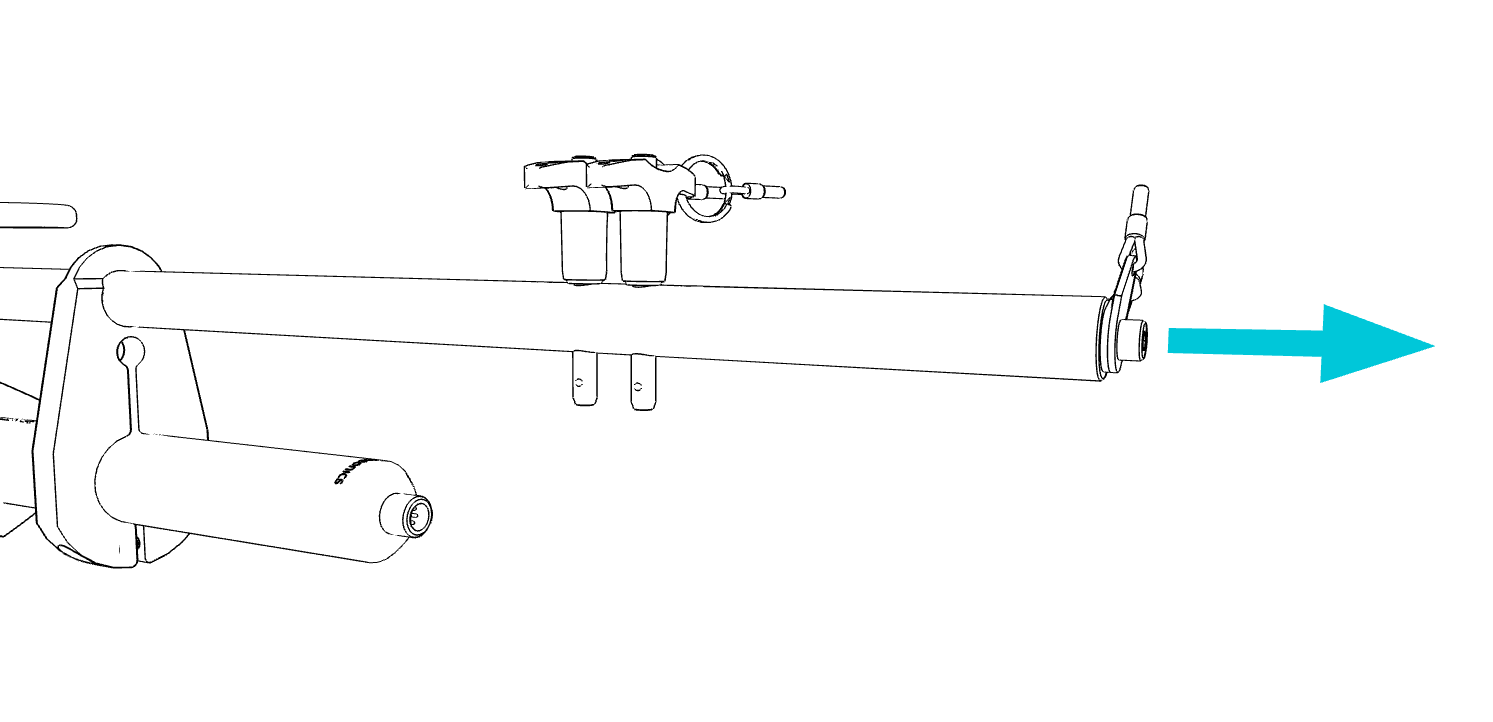 |
3 | Loosen the compression nut CN-RPA that fixes the probe to the NPT adapter 1N50-RPA | 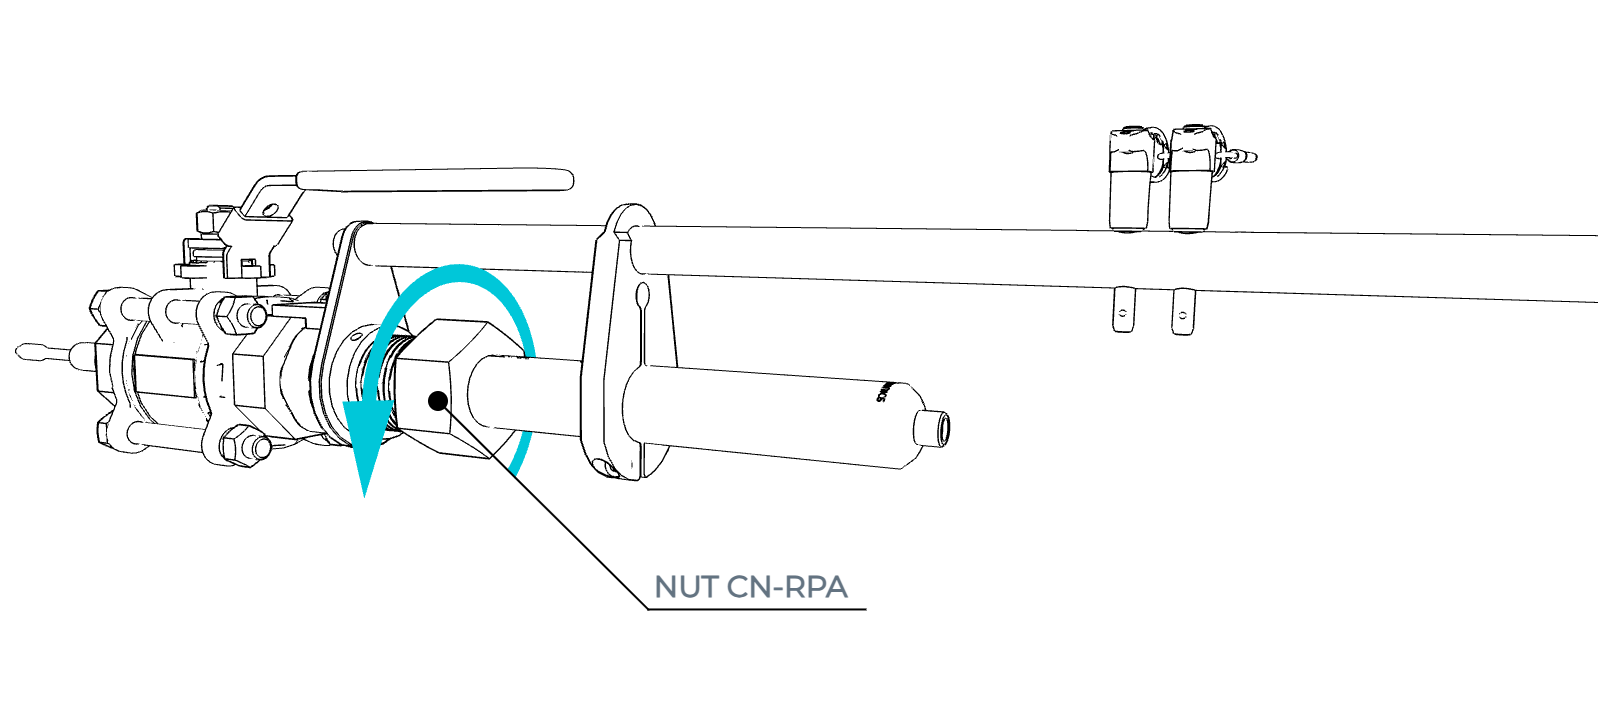 |
| 4 | Remove the locking pin B and slide the probe out until the traveler sheet TS-RPA touches the locking pin A. Store the locking pin in a safe place. | 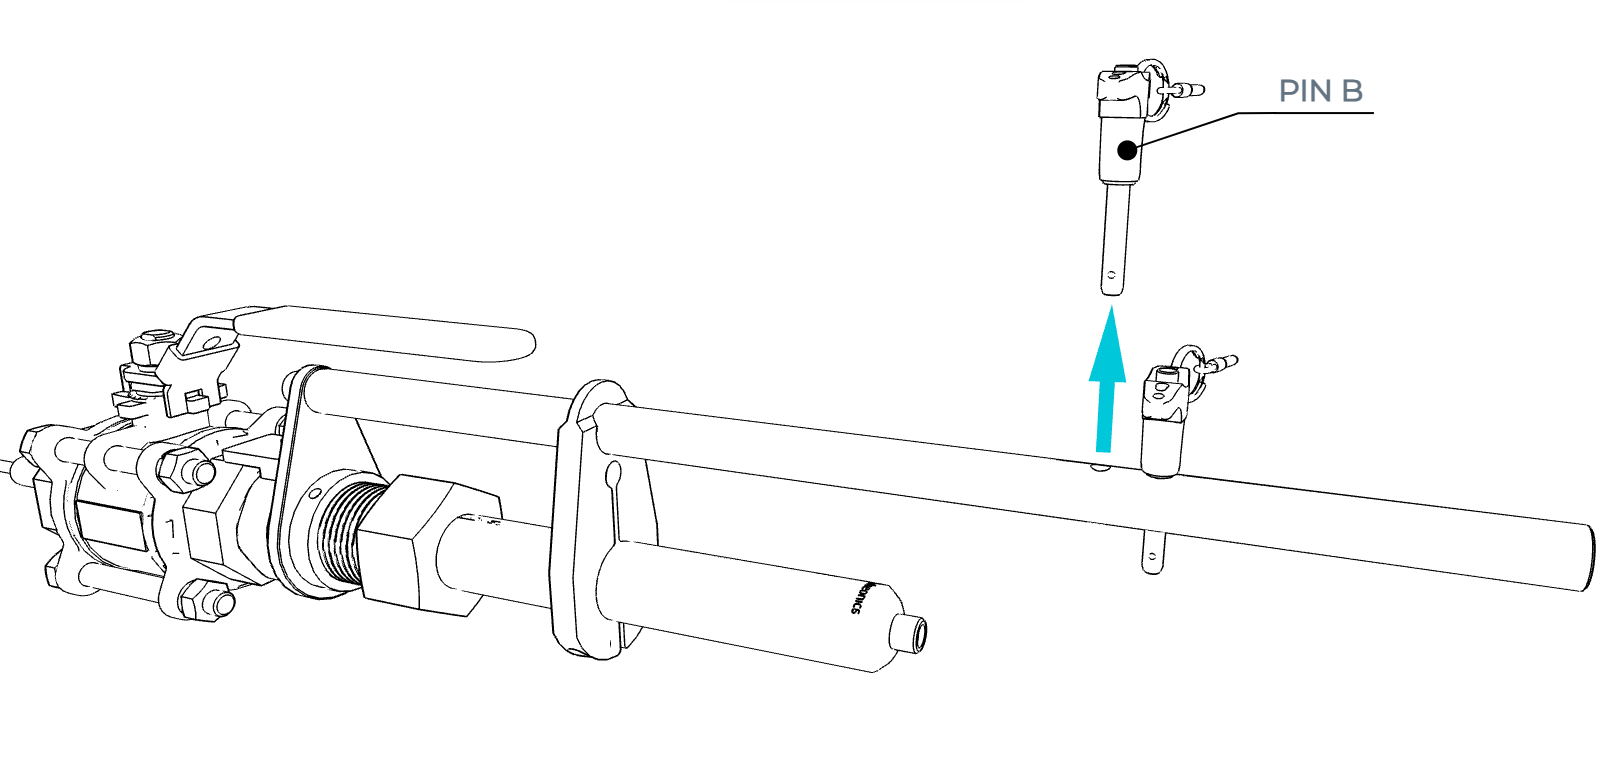 |
5 | Remove the locking pin A. Store the locking pin in a safe place. | 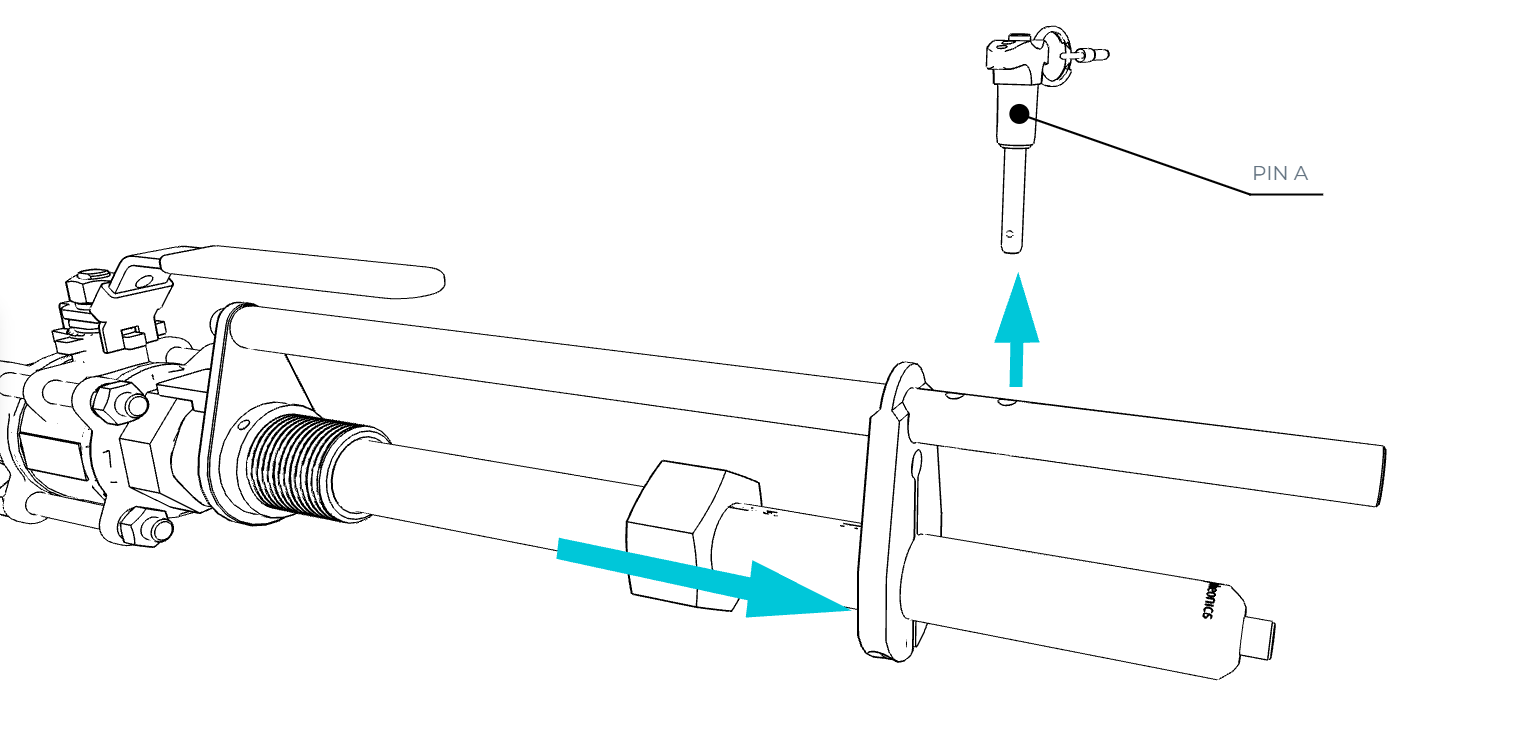 |
| 6 | With the help of the support sleeve SS-RPA, slide the probe out completely. | 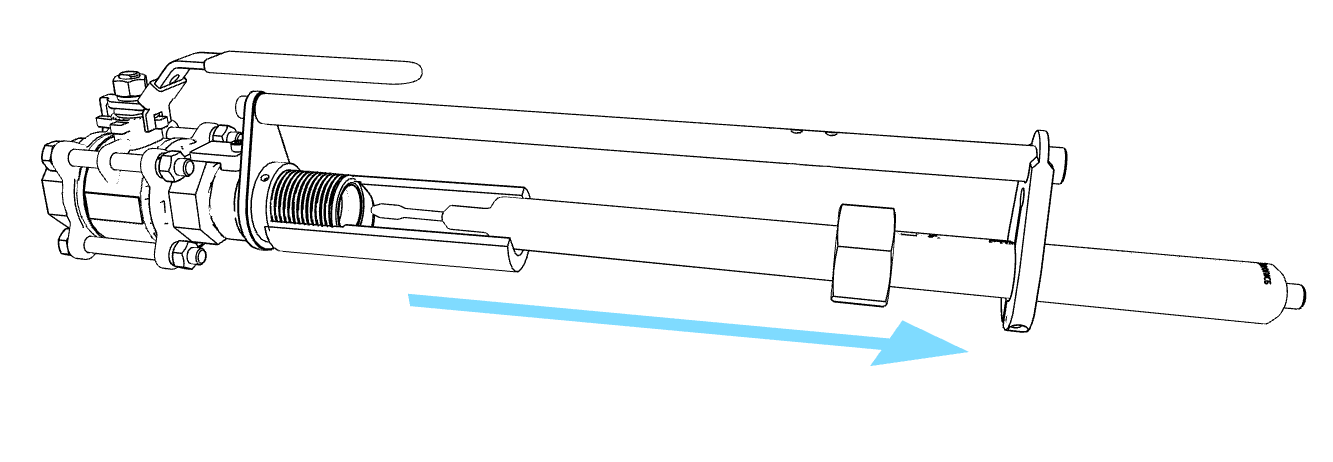 |
| 7 | Reinstall the protective sleeve on the probe to protect the sensing element. | 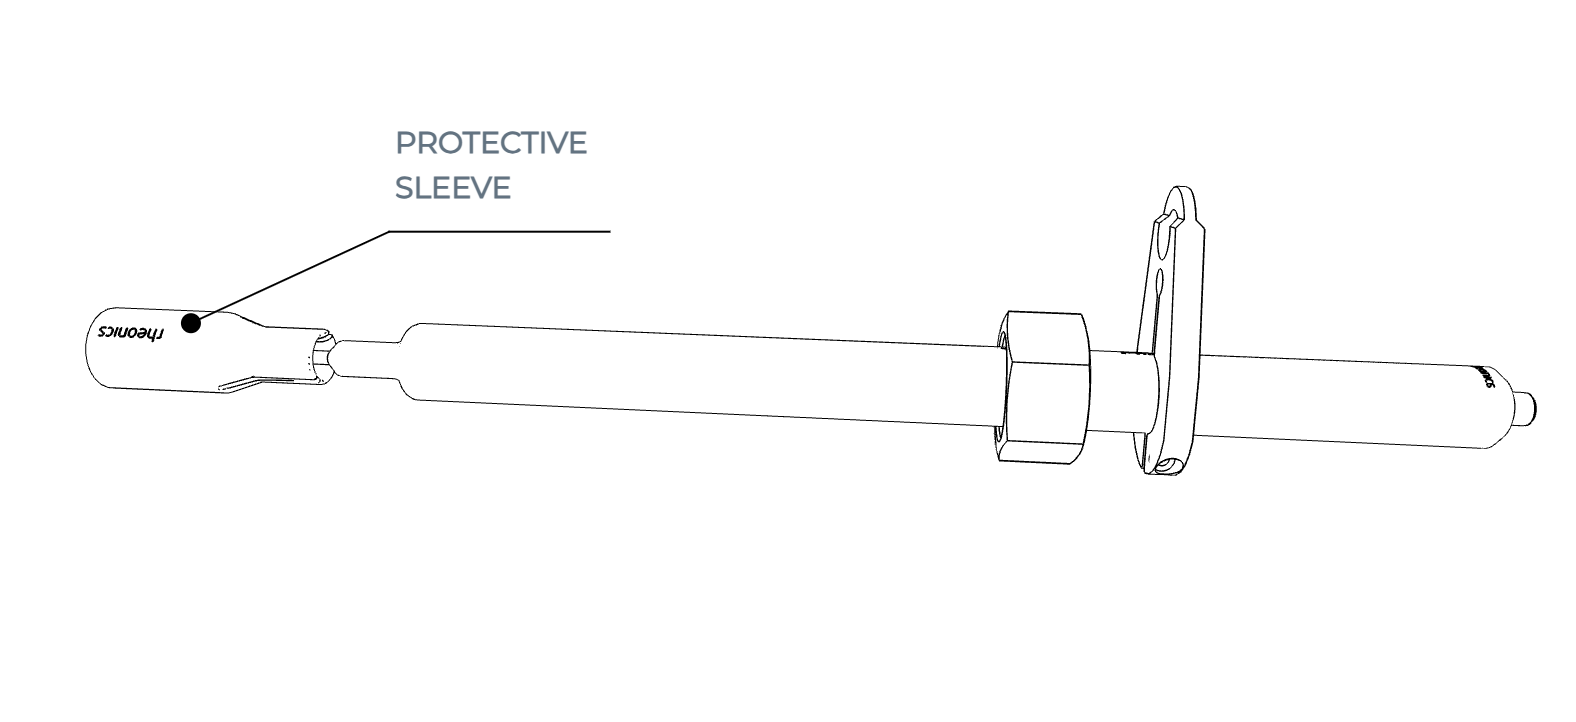 |
2. Valve Installation
Step | Instruction | Image |
1 | Using a 55 mm wrench, connect the ball valve BV1N50-RPA to the standpipe or other similar process connection. If possible, leave the handle of the valve at a comfortable position for operation. | 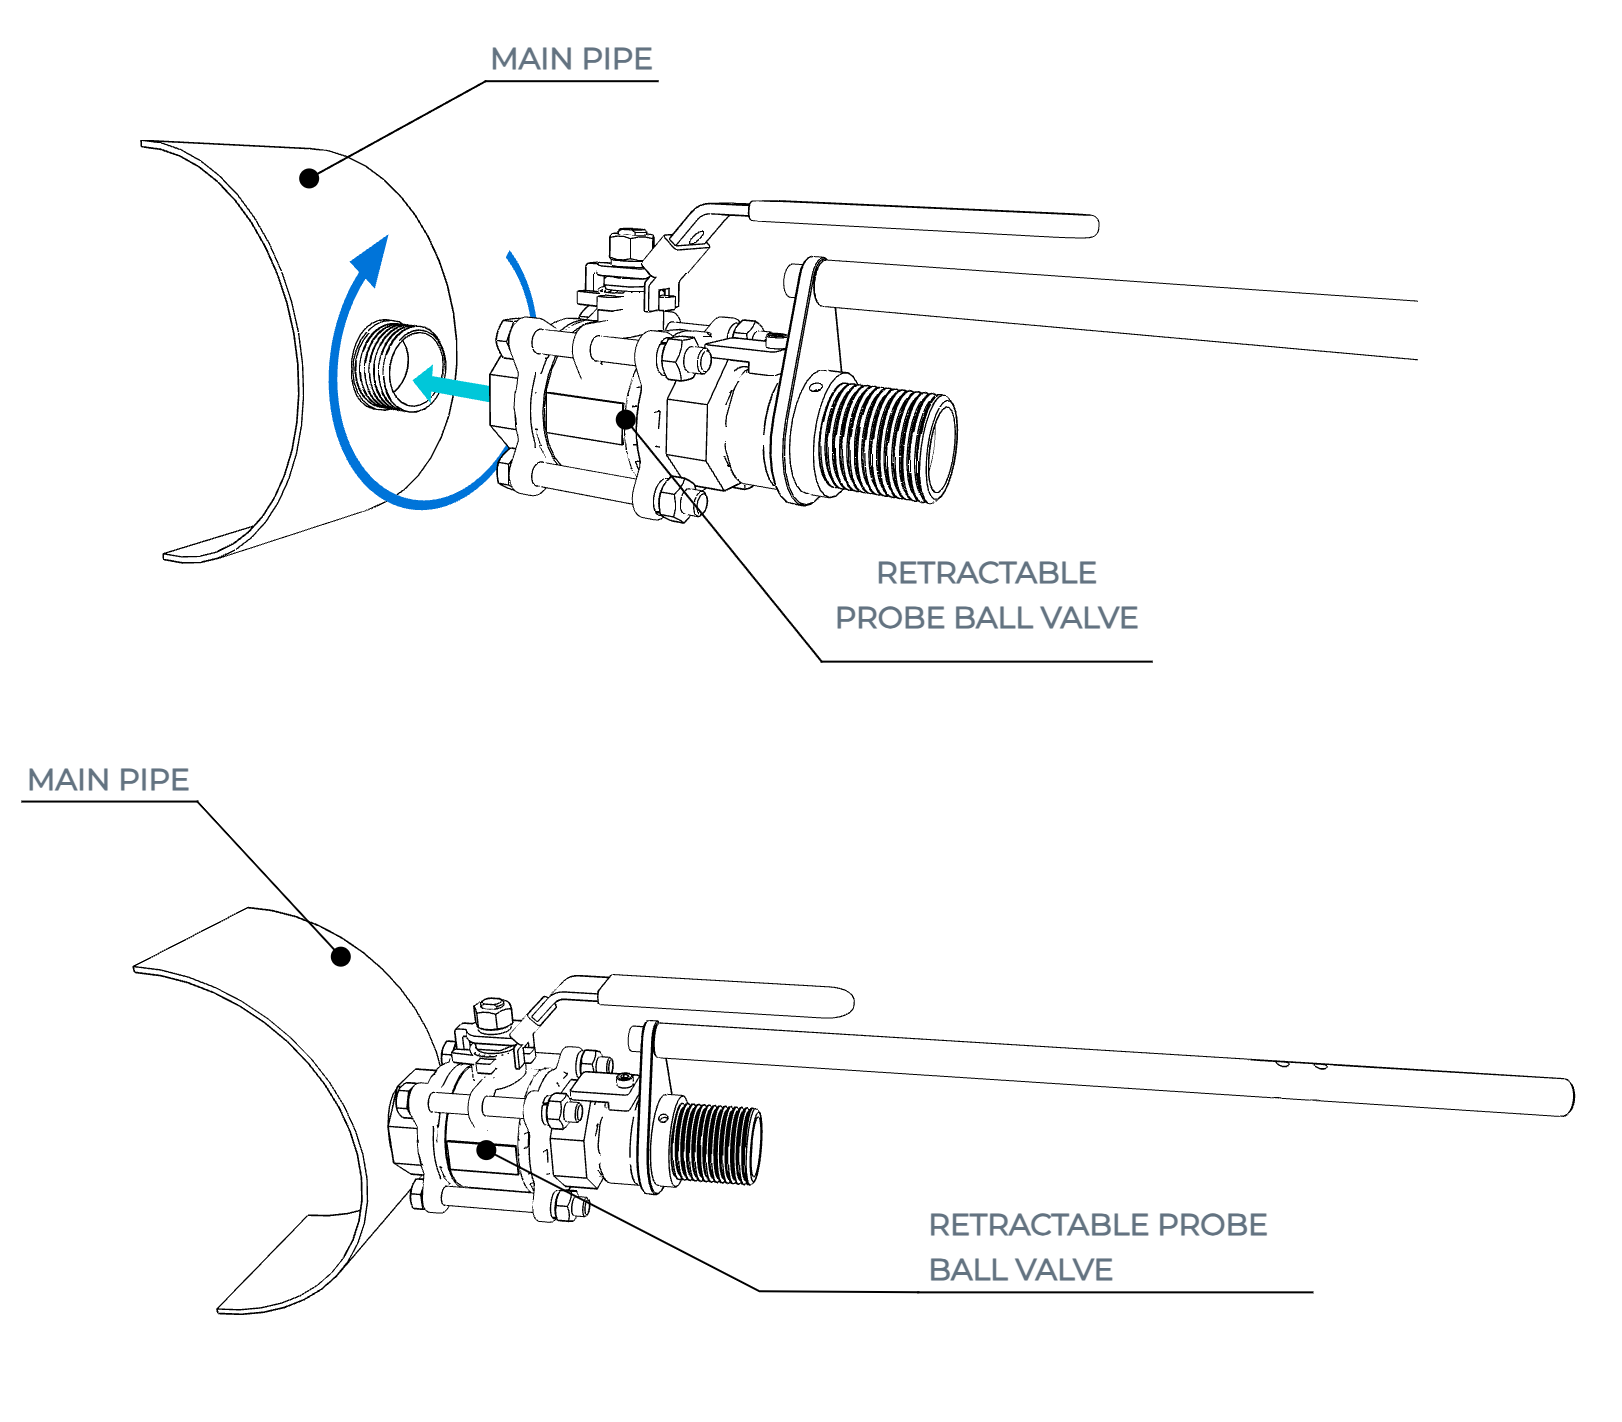 |
3. Probe Insertion
| ⚠ Warning: Make sure the pipe/process is at ambient pressure when inserting or removing the probe from the process line. |
Step | Instruction | Image |
1 | With the ball valve BV1N50-RPA closed, apply an FKM compatible lubricant on the O-ring OR-RPA at the front of the 1 ½” NPT adapter 1N50-RPA. | 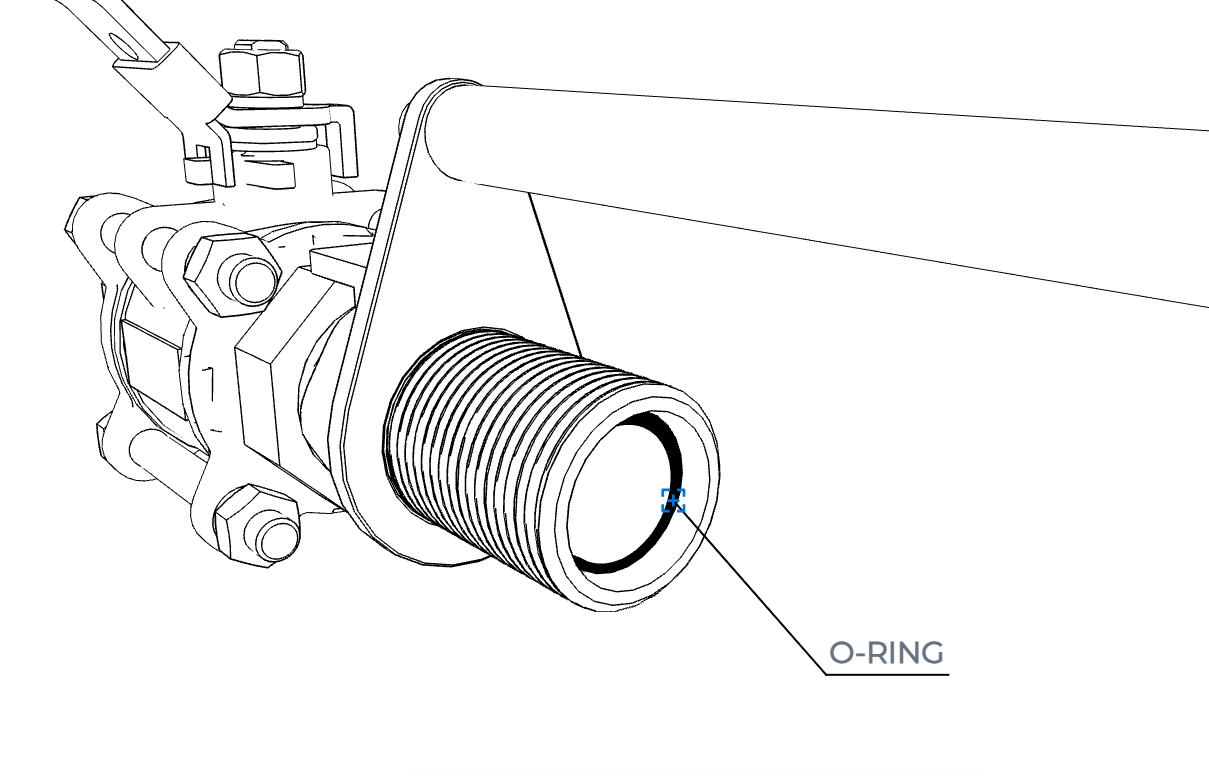 |
| 2 | Connect the support sleeve SS-RPA to the front of the adapter and insert one of the locking pins LP-RPA in hole B of the guiding rail RD-RPA. | 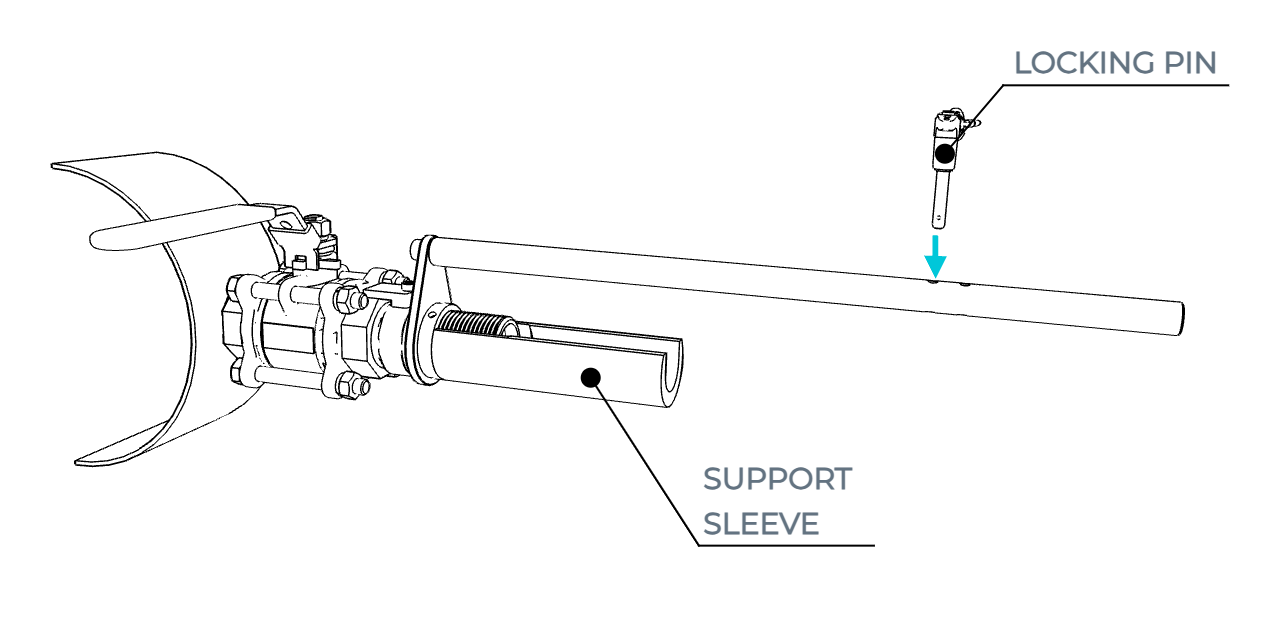 |
| 3 | Remove the protective sleeve SR-HD-PS from the probe tip. | 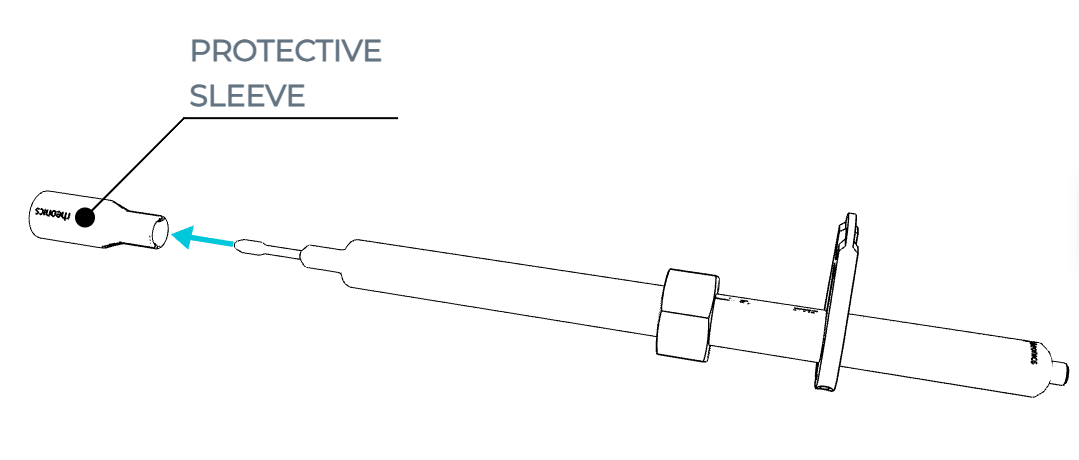 |
| 4 | Place the front of the probe on the support sleeve and and engage the traveler sheet TSRPA at the back of the probe to the guiding rail. | 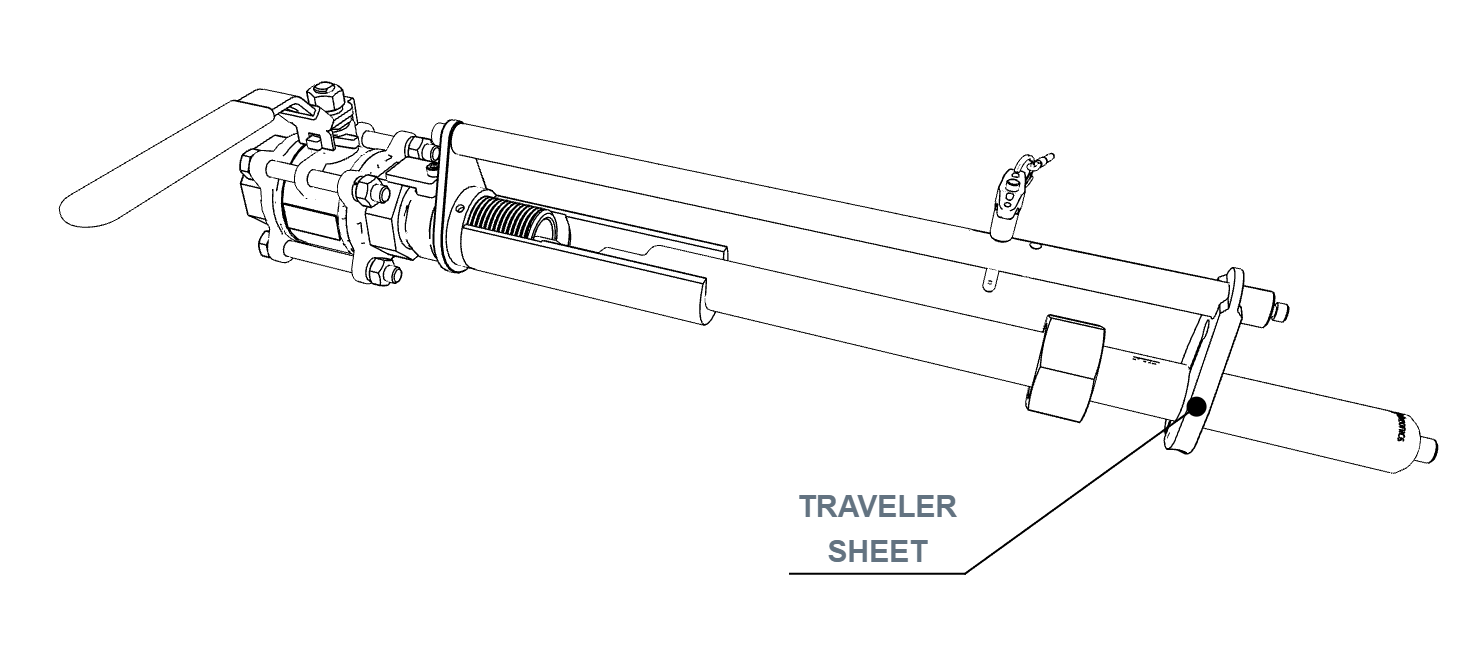 |
| 5 | Push the probe into the adapter until the traveler sheet touches the locking pin in position B. | 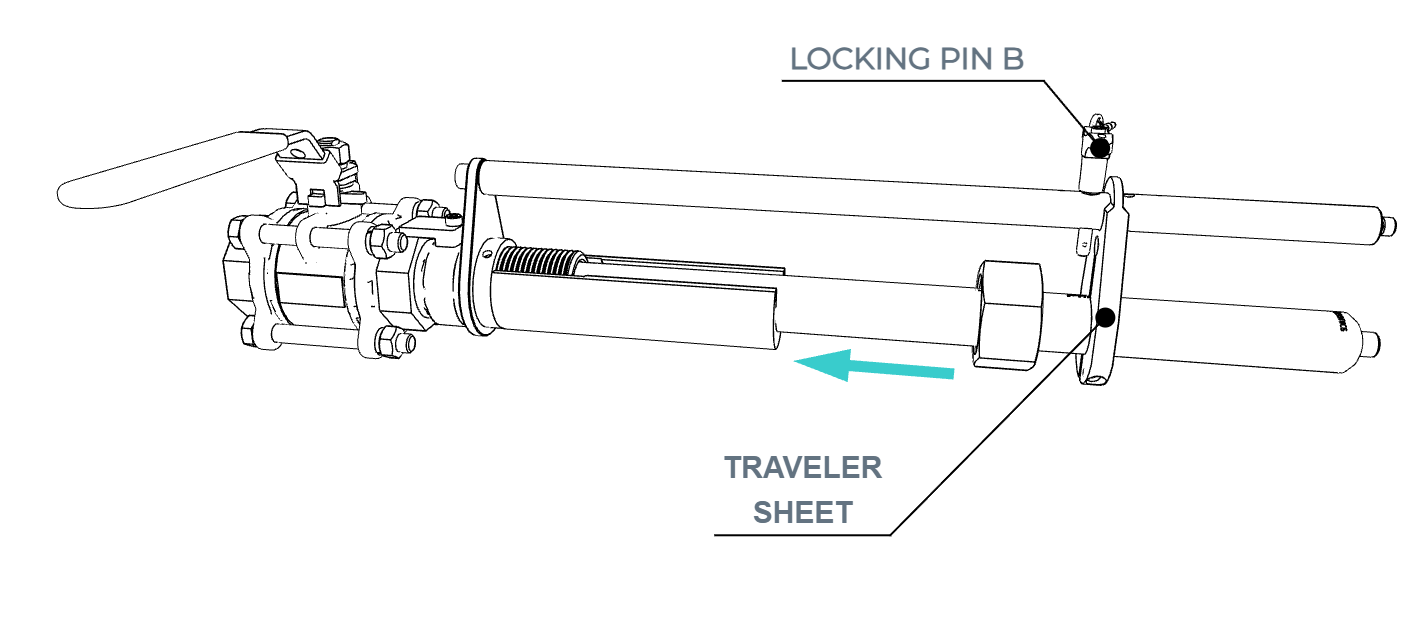 |
| 6 | Insert the second locking pin in position A of the guiding rail, blocking the traveler sheet between the two locking pins. Remove the support sleeve from the adapter. | 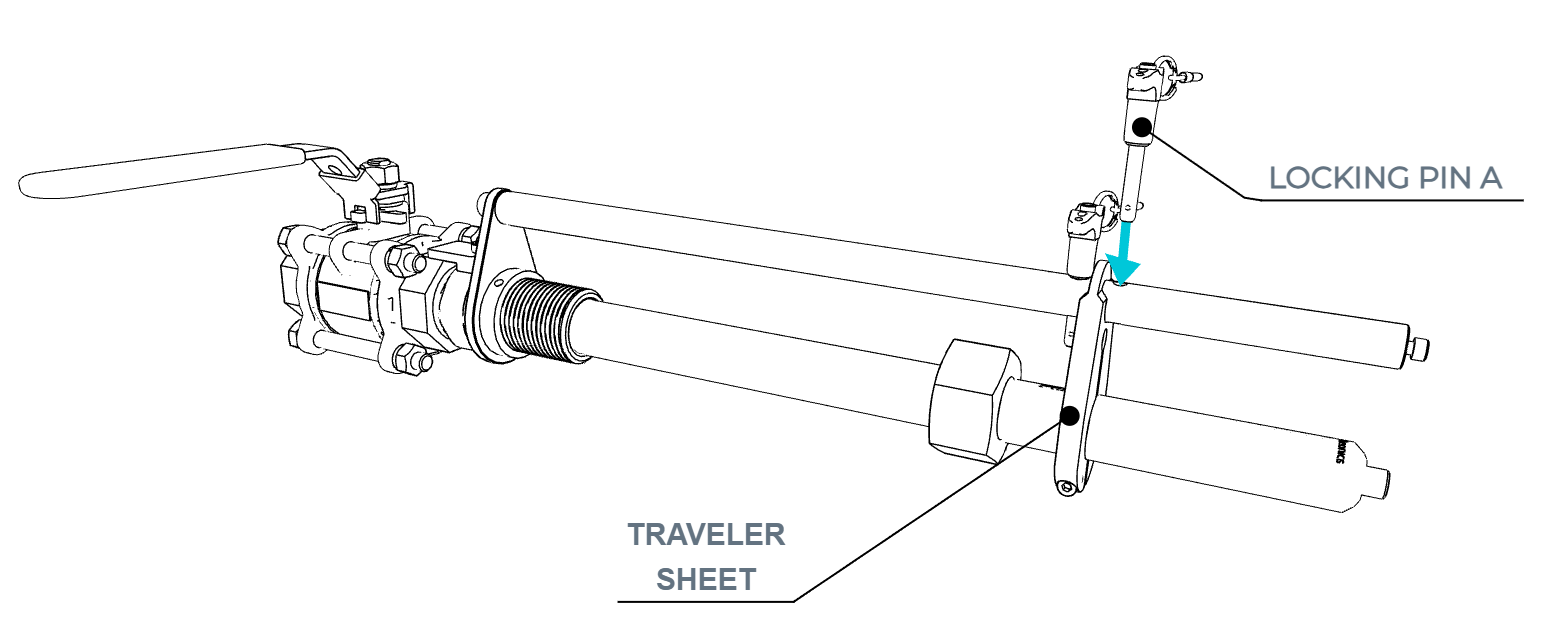 |
| 7 | Re-secure the tabs of the locking pins at the back of the guiding rail with the M5 screw. | 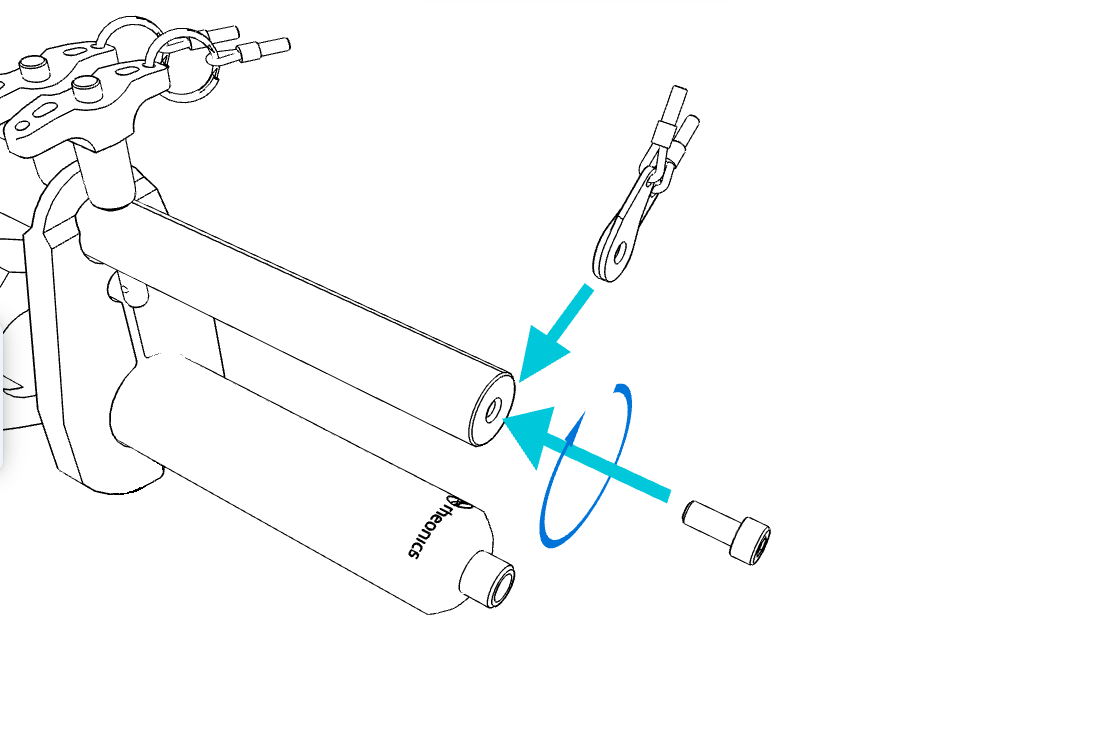 |
| 8 | Now the probe is engaged to the O-ring and the valve can be safely opened without process fluid being spilled. | 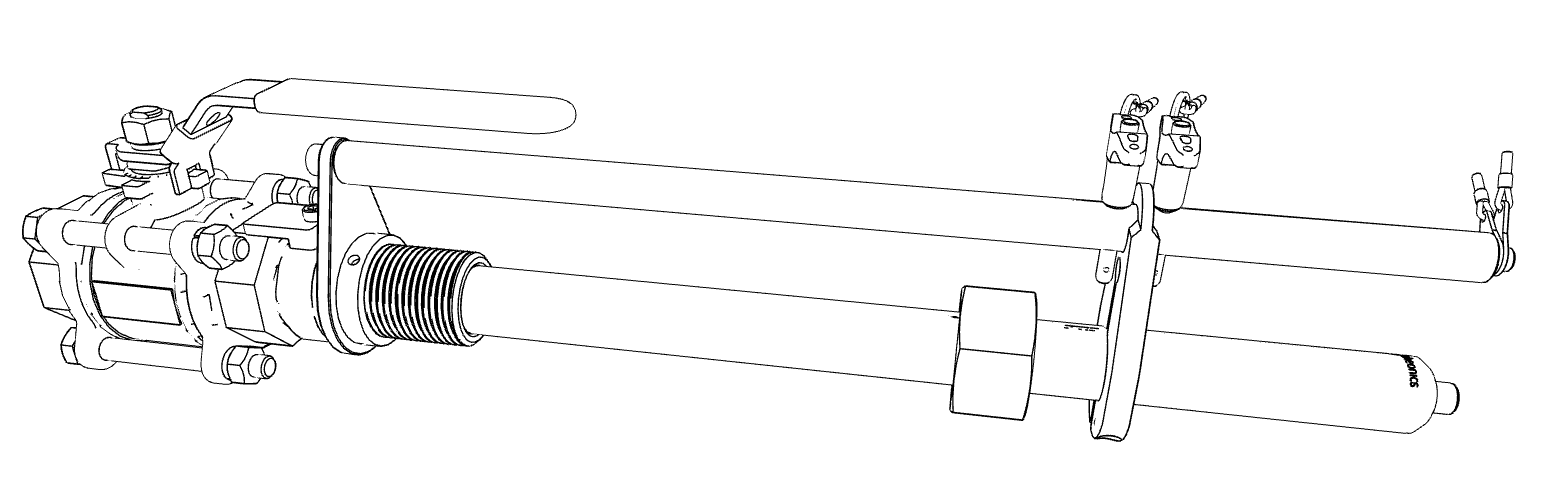 |
| 9 | Remove pin B, push the probe to its final position and hand tight the compression nut CNRPA to the adapter. Reinsert pin B. | 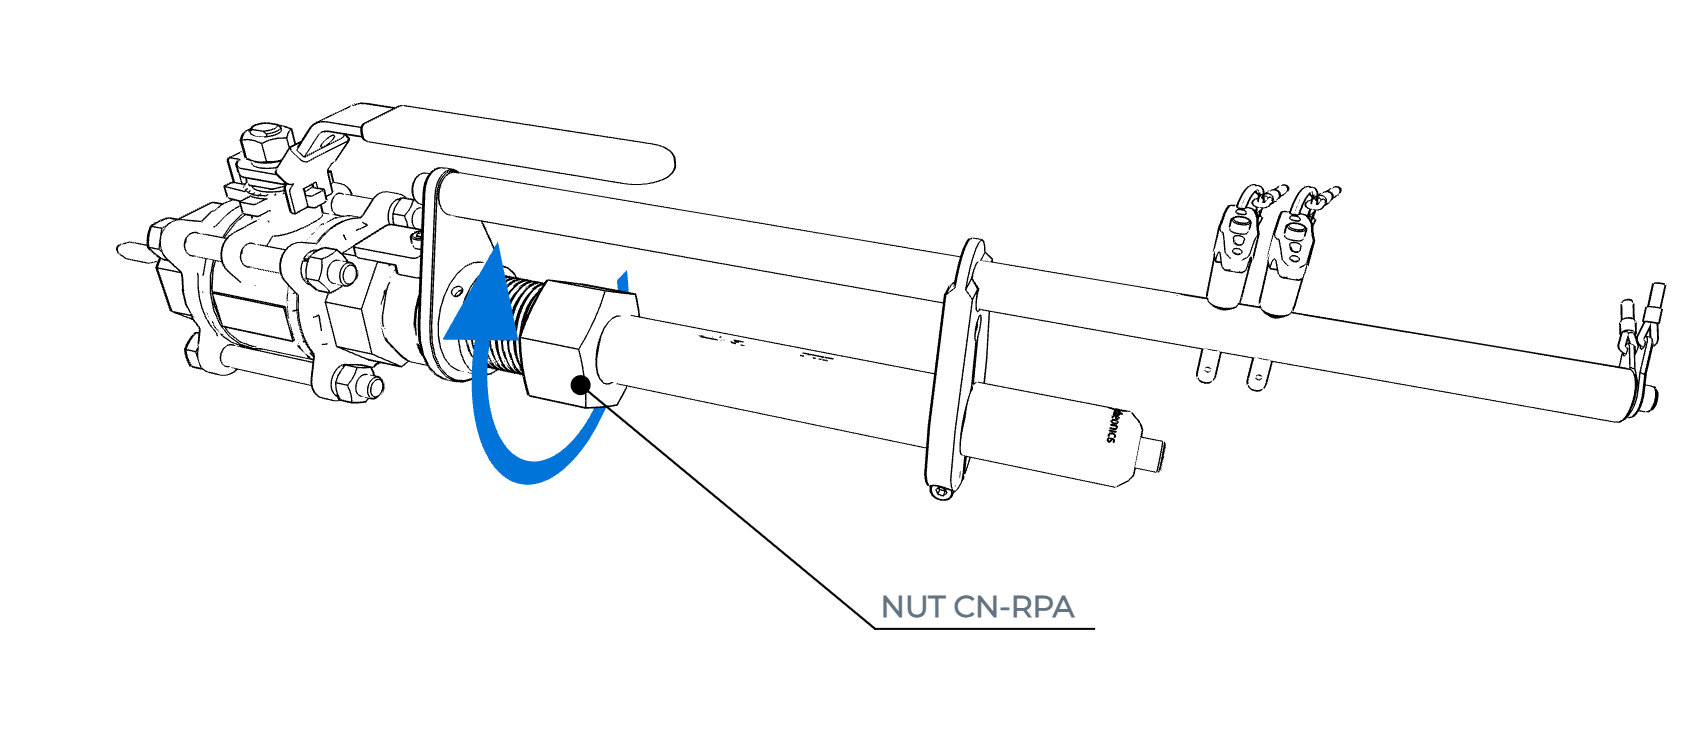 |
10 | Using a 50 mm wrench, tighten the compression nut with a 200 Nm torque. | 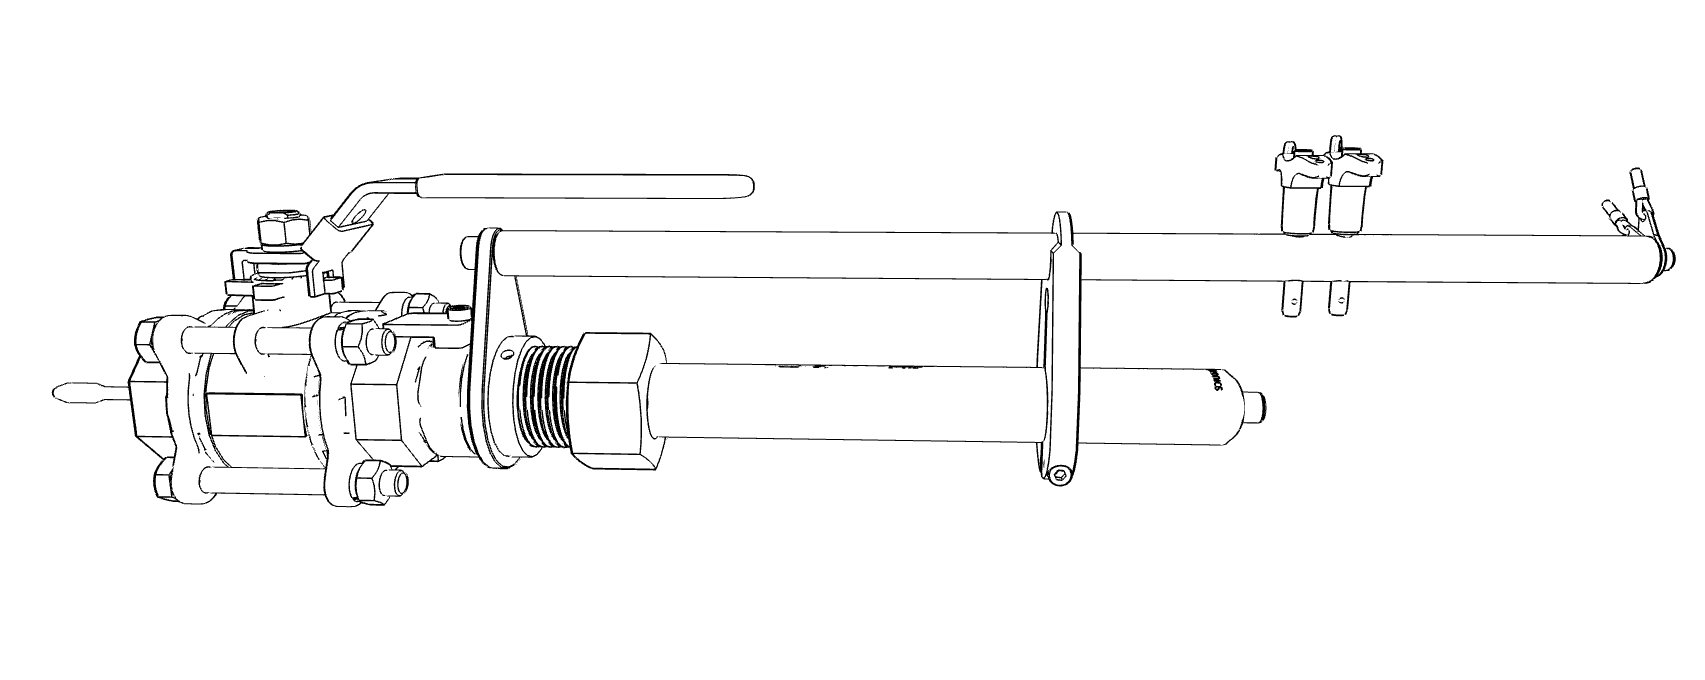 |
4. Probe Removal
| ⚠ Warning:Make sure the pipe/process is at ambient pressure when inserting or removing the probe from the process line. |
| Step | Instruction | Image |
| 1 | Using a 50 mm wrench, loosen the compression nut CN-RPA. | 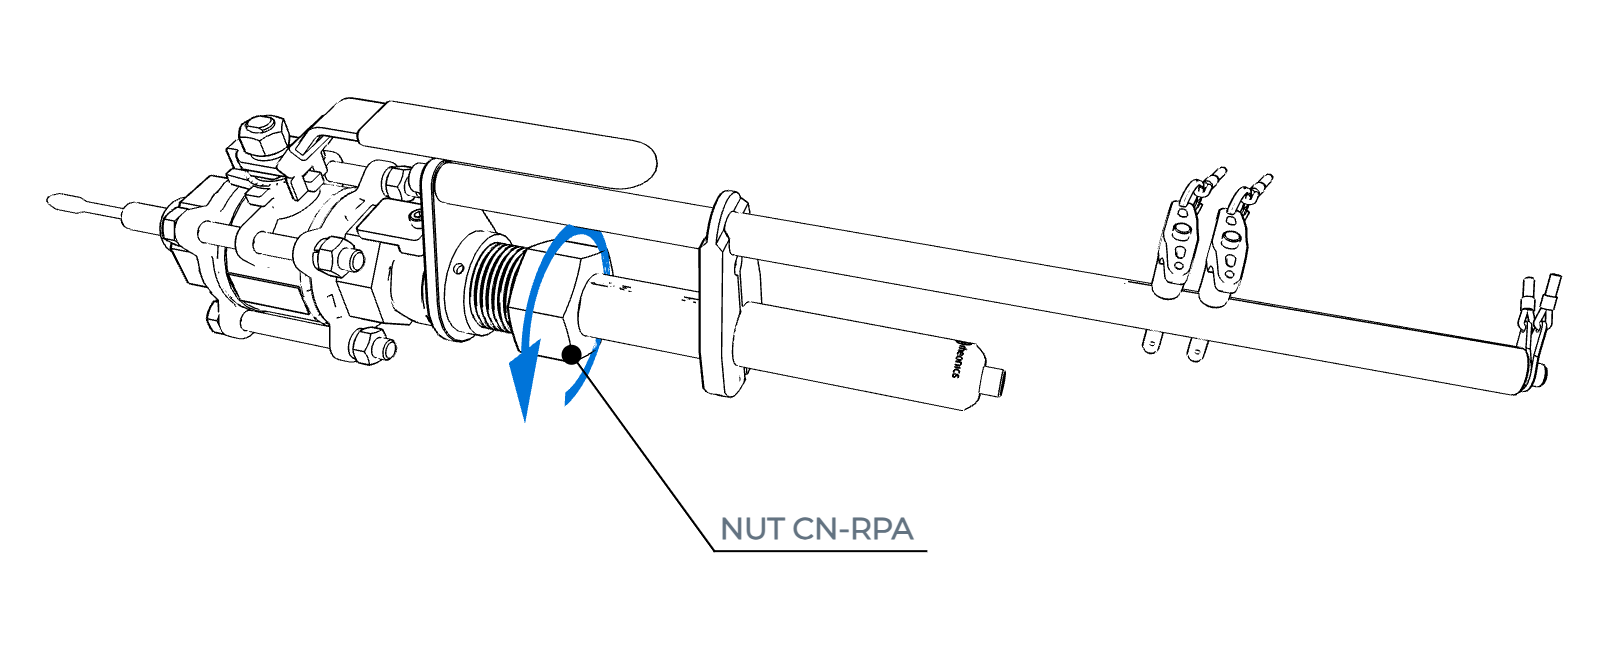 |
| 2 | Remove the locking pin LP-RPA from position B and pull the probe until the traveler sheet TS-RPA touches the locking pin in position A. | 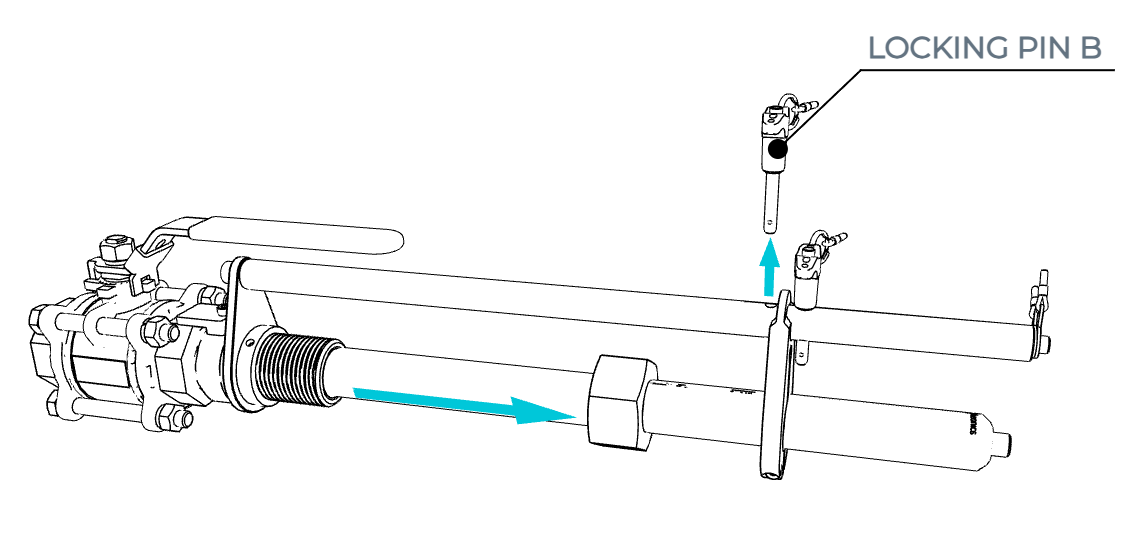 |
| 3 | Now the sensing element of the probe is past the sealing mechanism of the ball valve BV1N50-RPA and the valve can be closed. | 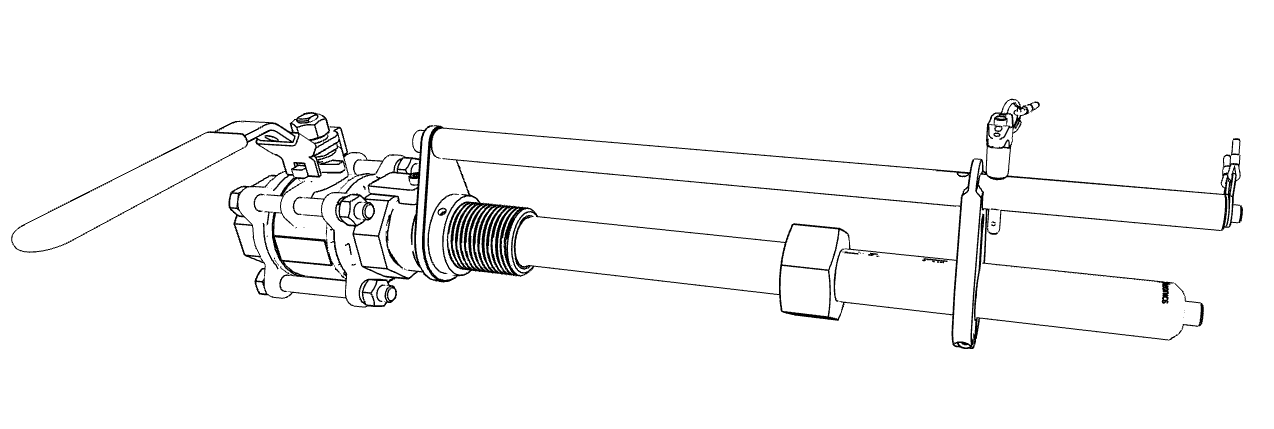 |
| 4 | Remove the M5 screw at the back of the guiding rail RD-RPA to free the tabs of the retaining cables holding the locking pins. Store the screw in and locking pins in a safe place. | 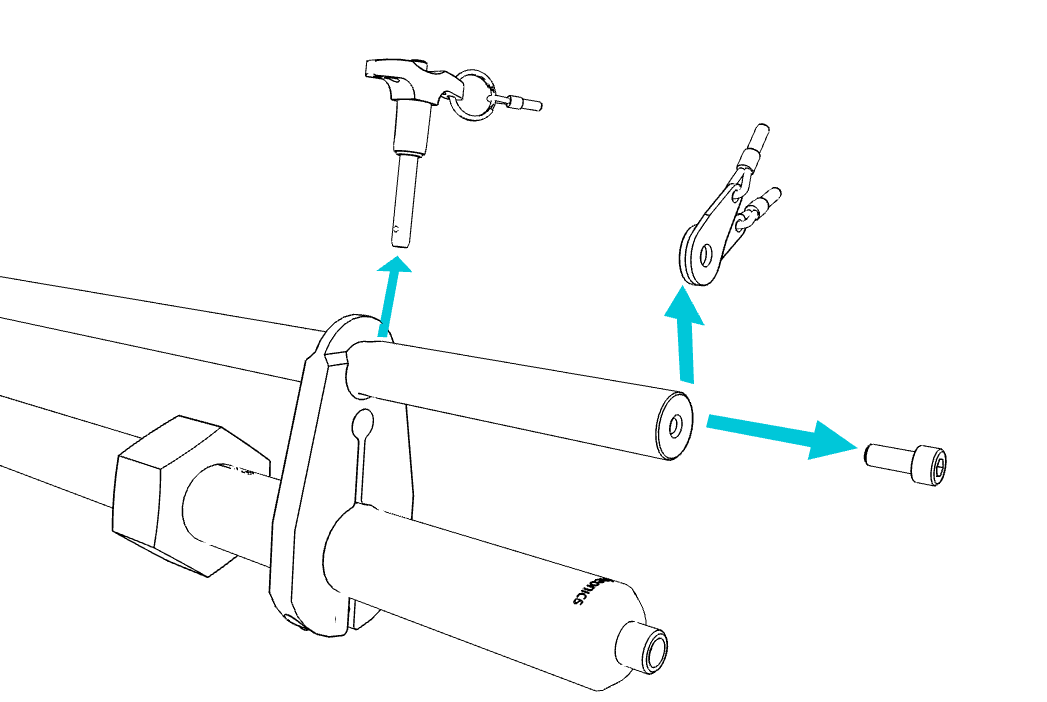 |
| 5 | Connect the support sleeve SS-RPA to the front of the 1 ½” NPT adapter 1N50-RPA and pull the probe out completely . | 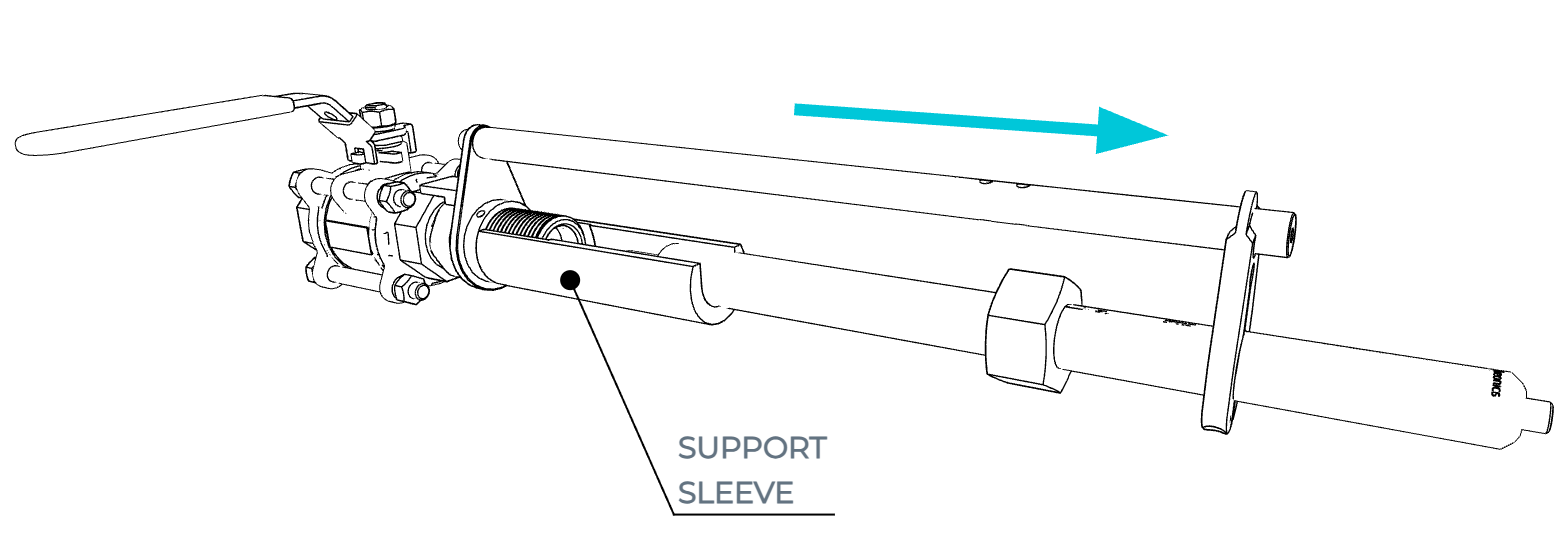 |
| 6 | Protect the sensing element of the probe with the protective sleeve SR-HD-PS. | 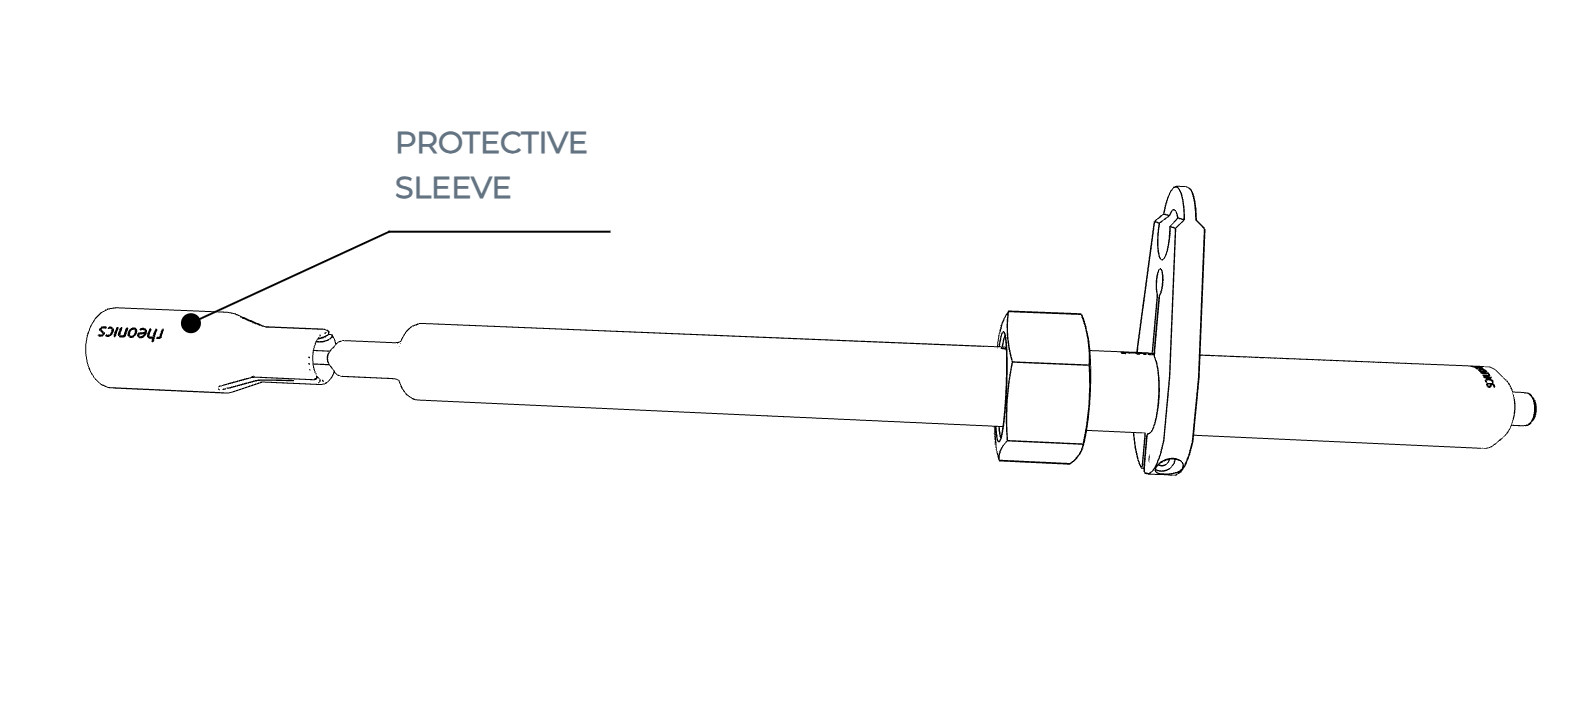 |
| 7 | Store the support sleeve and reinstall the locking pins to the guiding rail, securing the tabs with the M5 screw. | 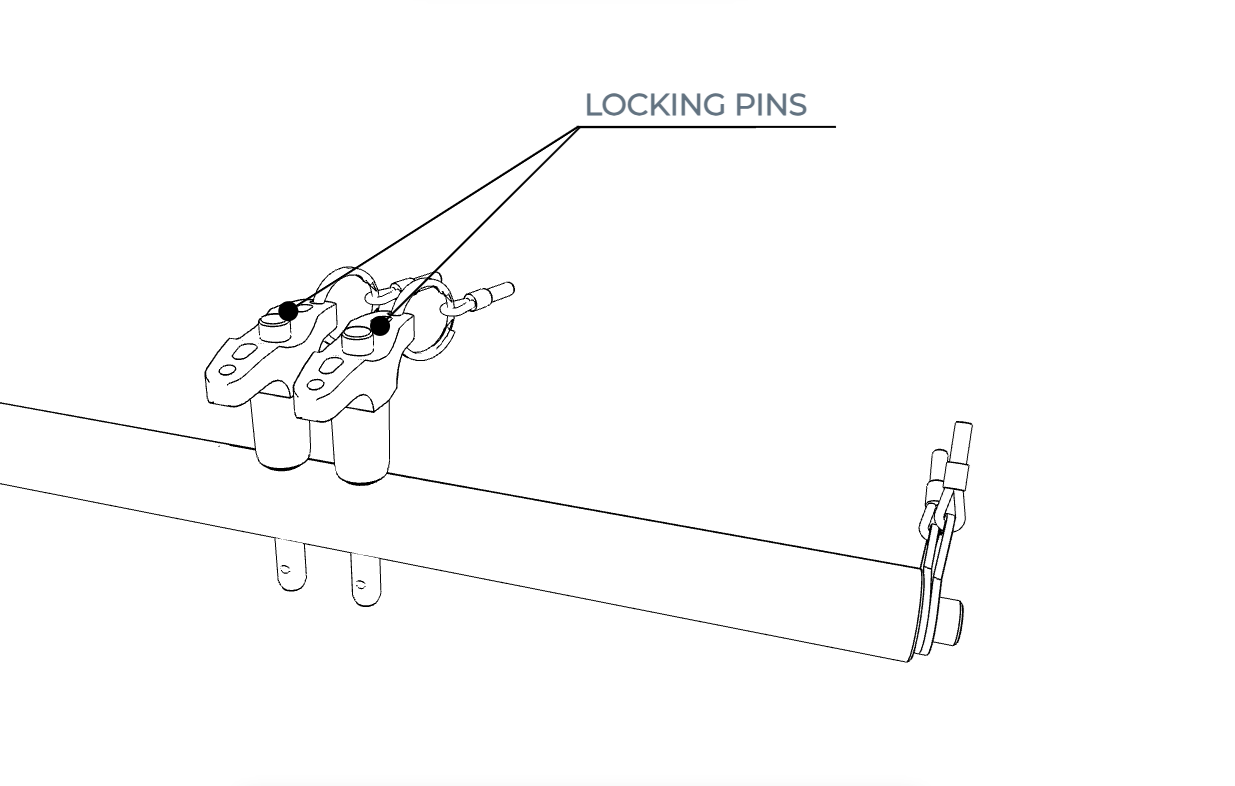 |
7. Installation examples
A common installation for the Rheonics RPA is in a line that has a pigging cleaning system. For this case, the sensor probe needs to be removed from the pipe to avoid an impact between the pigging head and the sensor probe. This is easily achieved by using the Rheonics RPA for both the process density and viscosity meter SRD as well as the process viscometer SRV.
8. How to order the Rheonics Retractable Probe?
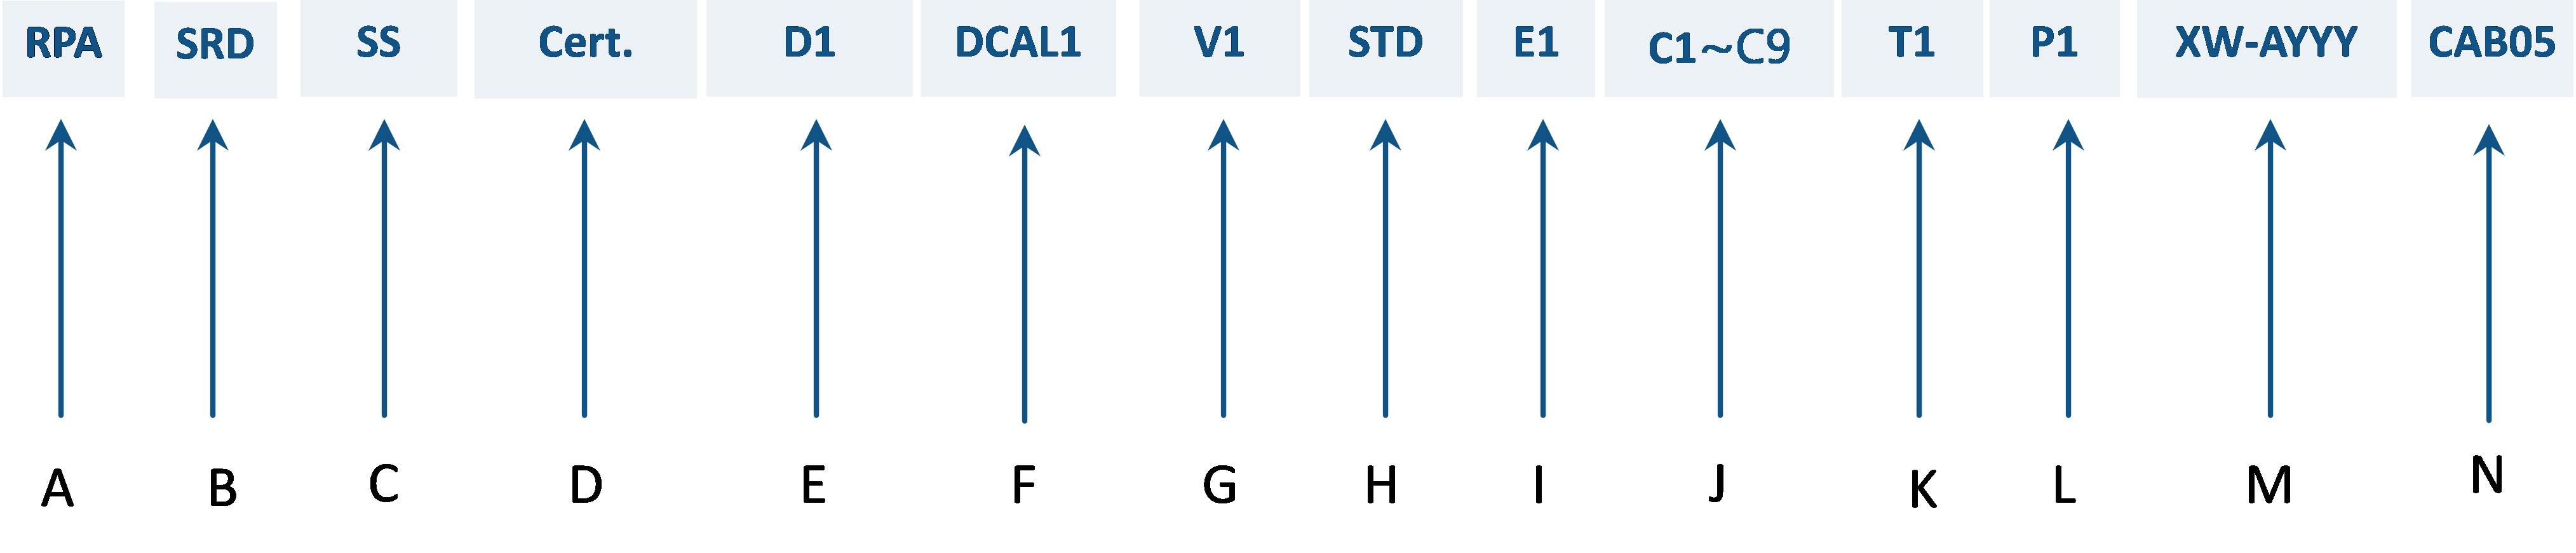
A: Retractable Probe Assembly
B: Sensor Type (SRV or SRD)
C: Wetted Material
D: Certifications (Optional)
E: Density Range (Only for SRD version)
F: Density Calibration (Only for SRD version)
G: Viscosity Range
H: Viscosity Calibration
I: Electronics Variant
J: Communication Protocols
K: Temperature Rating
L: Pressure Rating
M: Variant Design (See options below)
- XW: Select between X5 and X8 Variant
- AYYY: Insertion length required (Consider the Standpipe length and the immersion required)
N: Cable variant and Length